Most routers share the same broad range of features and controls, all of which are designed to help you operate the machine both accurately and safely.
The router operates at very high spindle speeds in order to produce a clean and precise surface finish.
The ideal is a peripheral speed on the cutter of around 1000 metres per minute, which necessitates spindle speeds in excess of 20,000 rpm for smaller cutters. Large diameter cutters have a far higher peripheral speed than smaller ones, so in order to maintain the correct and safe cutting speed, it is necessary to have some control over the spindle speed. Cutters that are run too fast will burn both the wood and themselves. Conversely, those that are run too slowly will also leave a poor finish and may even snatch at the work.
Most manufacturers now offer their routers with built-in electronic variable speed control, which allows the spindle speed to be adjusted to suit the cutter in use, and/or the type of material being cut. The control for speed is usually a simple rotary dial, which shows several speed positions. You will have to find the actual speed for each position by looking in the router handbook, as they all vary. Some machines may actually have it marked on the motor body. In reality, experience will soon allow you to make adjustments whilst you work, as the precise speed is not critical provided the finish is good and the cutter is not burning the material.
Armature, Field Coil, Bearings and Carbons
The armature is the rotating coil of the electric motor, which is wound on the motor spindle. The spindle is machined to take the collet and nut to hold the cutter. Some routers have a deeper hole in the armature, which allows longer cutters to be inserted.
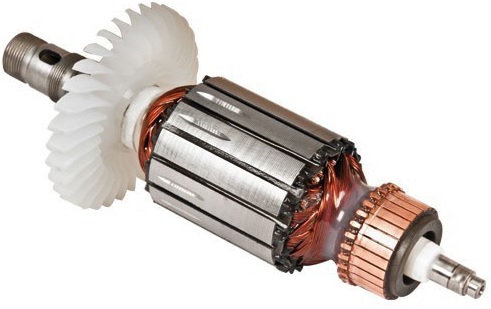
The field coil is the stationary electric coil that creates the opposing magnetic field to cause the armature to rotate.
The spindle is mounted in a pair of bearing races to help it run smoothly. They are carefully aligned and firmly seated in the motor housing. Sealed bearings are packed with grease and (if the tool is not abused) should require no maintenance. Although they should have a life expectancy of at least 100 hours of running time. It is worth checking them regularly for play and, if necessary, replacing them.
Two carbon brushes are fitted which run against the commutator under light spring pressure. Excess sparking is usually an indication that the brushes have worn and need replacing. Please note carbon brush motors should only be run 20 minutes in every hour.
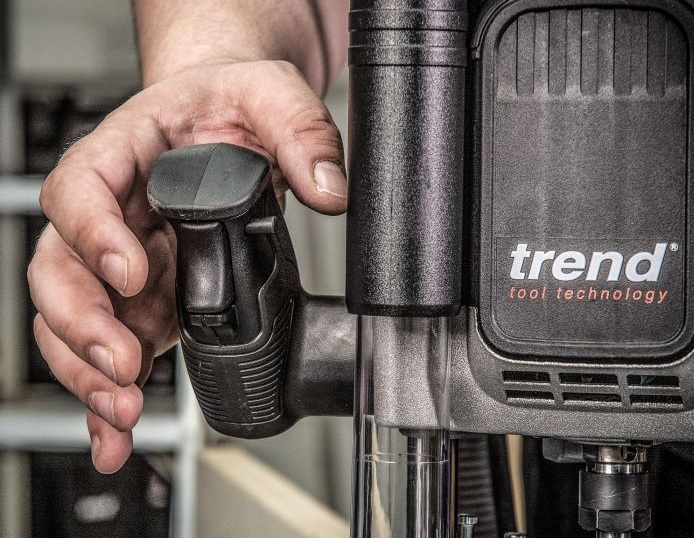
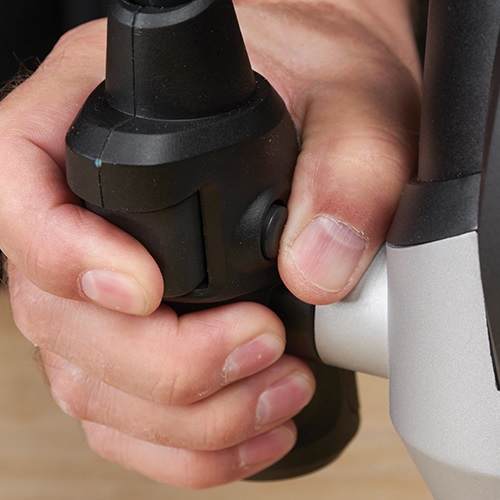
Side Handles
These are used to steady and manoeuvre the router during a cut and must therefore be comfortable to grip. On smaller routers they are usually simple round knobs, but on larger, more powerful machines they tend to be elongated. This helps to control the gyroscopic effect of the spinning motor, which tries to turn the router in the operator’s hands when it is lifted out of a cut. Some machines may also allow you to adjust the orientation of their handles for maximum comfort. Having handles low down on the router body gives you much better control for hand work, but in this position they may possibly interfere if you start using the router along a straightedge or in some jigs.
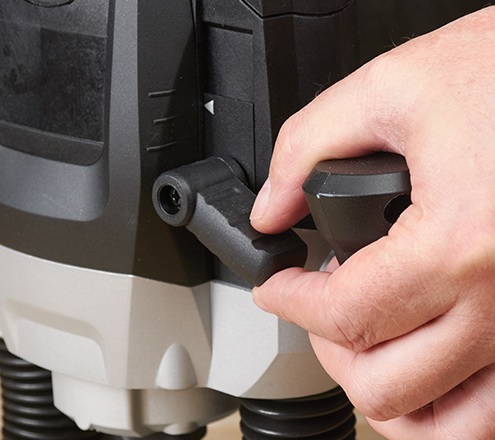
Plunge Lock and Columns
This locks the movement of the spring loaded router body on the plunge bars to determine the depth of cut. As the router is often plunged into the work at the beginning of a cut, it is important that the lock lever can be operated easily without pushing the router off line as you do so. Every manufacturer has their own design of plunge lock, with some being very much easier to use than others. There are three main variations of lock mechanism:
1. A separate lever
2. A latch built into the handle
3. A twist lock on one of the side handles
The latter two options are the easiest to operate, particularly if you are trying to adjust the router mid cut.
The plunge columns allow the router to plunge accurately down to enter the cutter into the work at 90 degrees. Return springs lift the motor housing to ensure that the cutter is retracted from the cut when the operation is complete. These columns should be kept clean and lightly oiled to ensure a smooth plunge action. Routers with a longer plunge will allow the user to achieve greater depth (up to 80 mm), which is particularly useful when routing deep mortises.
On/Off Switch
Router switches vary almost as much as the plunge lock types, but whatever the design, it is vital that it is easily accessible without removing your hand from the side handle. For this reason, switches that are actually built into the handle are best and those that incorporate a safety lock-off button are better still. These require you to operate the side button before the router can be switched on and therefore prevent the possibility of accidental starting if you pick up the machine carelessly, or knock it as you put it down on the bench.
The ‘dead man’ switch that requires continual holding to operate may seem a safer option, but can become tiring for long runs and awkward if you want to use the router mounted under a table. In this case you have to hold it on using a separate trigger lock and then operate the machine via the safety switch on the table. Also, some operations may require you to change hands part way through a cut, for example when circle cutting. In which case, the router will stop and restart if you are using a dead man switch and this may leave a distinct cutter mark or burn unless you are very careful.
Depth Stop
On a plunge router it is essential to have a depth stop that can be preset for your maximum cut. On cheaper routers this is just a simple rod with a crude graduated scale. Although these are effective, care should be taken with the scale, as it can bear no relation to the amount of cutter projection. Better routers allow you to zero out the depth scale with the bit touching the work surface before you start. These then give you a true reading for the depth of plunge, rather than a comparative one.
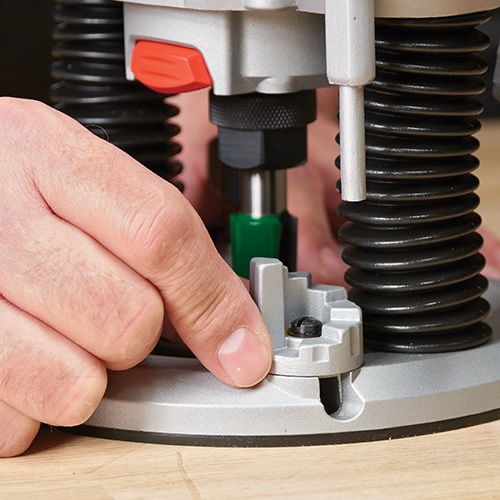
Some form of micro-adjustment built into the depth stop is useful if you are making precise cuts, for example when inlaying. In this case, a geared adjustment mechanism which incorporates a vernier or dial gauge makes accurate setting a simple process without having to physically measure the amount of cutter projection. Most routers use the depth stop in conjunction with a multi-position turret, which allows several depths to be preset. This allows quick resetting of the cutting depth when routing in stages, or for stepped recessing for cabinet fittings. The turret simply rotates on a ‘click’ location stud to line up under the depth stop, each tower of the turret being individually adjustable for height.
Fine Height Adjuster
A fine height adjuster accessory is one of the most useful accessories for a router. The fine height adjuster is fitted to the tallest stud on the turret stop while the router is plunged down. Some routers have what is called an adjustable return stop and nut fitted onto a stud that is connected to the router base plate. The fine height adjuster is sometimes fitted in place of the nut on the stud.
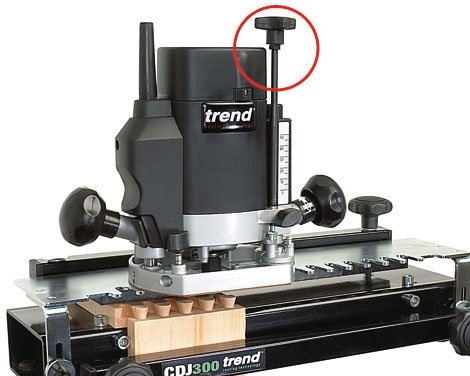
Some routers already have a fine height adjuster built in to the body of the machine, but if not, there is probably one available as an accessory, they just fit onto one of the turrets of the depth stop. They are essential for making precise adjustments, particularly when the router is mounted under a table and you will not be able to use some of the additional jigs, like the dovetailer, without one.
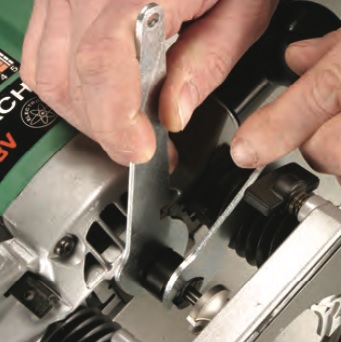
Spindle Lock
For fitting or removing cutters it is necessary to hold the spindle still whilst operating the collet. Older routers had no provision for locking the spindle, so cutter changing required the use of two spanners, one to hold the spindle, the other to operate the collet. Newer machines now incorporate a sliding spindle lock that allows much easier and quicker cutter changing, requiring only a single spanner.
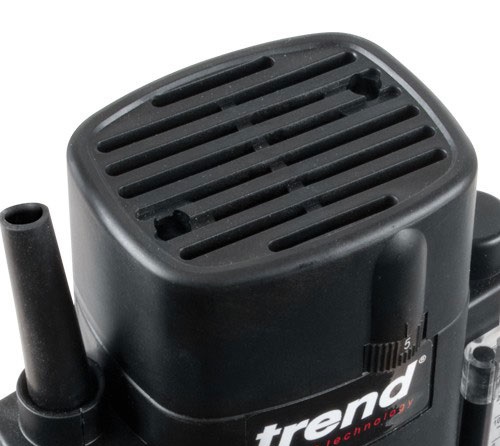
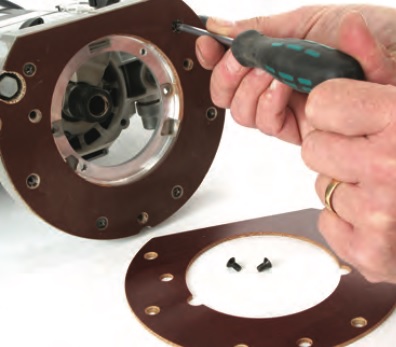
Top Vent
Air is pulled into the ventilation intake slots to cool the motor and bearings. These slots (or grilles) should be kept clear while the router is running to maintain a flow of air. Always ensure that chips and other waste are kept away to prevent them from being sucked into the router. The top vent guards and protects the top bearing and armature commutator but, if separate from the body moulding, can be occasionally removed to clear dust and inspect or change the carbon brushes.
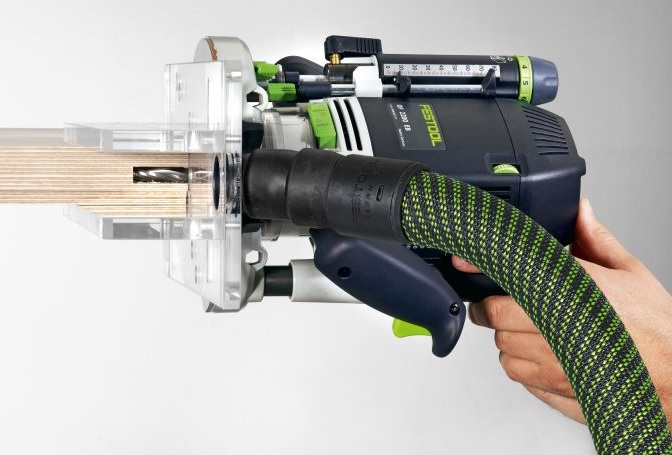
Dust Extraction
Dust extraction has become quite an issue with all modern power tools and it is particularly important on a router. Cheaper machines usually have some form of detachable hood fitted, which although made of clear plastic does restrict visibility of the cut and sometimes interferes with cutter changing. The dust spout on the hood needs to be attached to a suitable vacuum extractor via a flexible hose, which can make the set-up slightly cumbersome. There are a few professional routers with built in extraction ports, taking the dust out through an enlarged plunge column. These are much more convenient to use but this is reflected in the cost of the router.
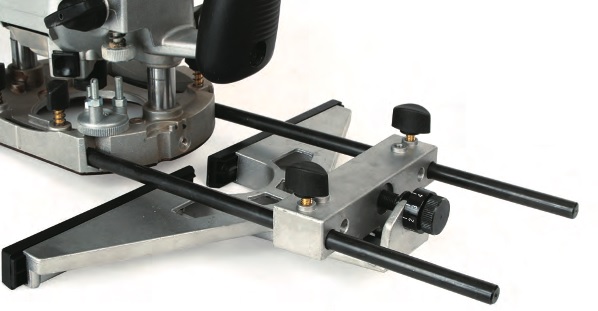
Side Fence
A side-fence acts as a guide for making grooves, rebates or moulding cuts parallel to the edge of straight-sided work pieces. For precise work, the side-fence should be fitted with a micro adjuster and the faces should be adjustable to allow the cutter aperture to be closed up for maximum support. The side fence body slides on the rods to position the router from the edge guide. The rods are locked in position with the thumbscrews.
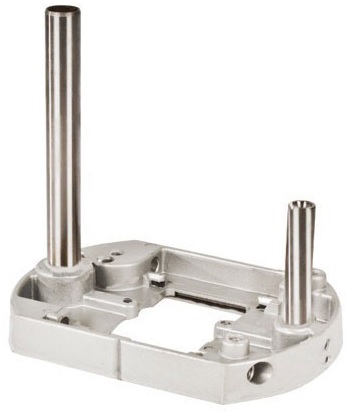
Base Plate
The baseplate is another important component of the router. It must be strong enough to take the vertical plunge columns and is machined to take a range of accessories like the side-fence, template bushes and dust extraction hood. The actual shape of the base is not critical, some are completely round, whilst others have one or two flat faces. However it is vital that the baseplate is concentric to the cutter, to allow you to guide the router against a straightedge or jig. The size of the central hole is another important consideration. Obviously the bigger this is, the larger the cutter you can fit, provided it is within the power envelope of the router. A large cutter opening will also allow better visibility of the cutting edge during a cut. However, if the cutter opening is too big, there may be problems with regard to support when you are working with narrow stock, or on the corner of boards.
A large base opening should have the facility to mount a reduction plate so standard guide bushes can be fitted for template operations. The plastic sub-base should be replaceable as it will inevitably wear or chip, and it must be in good condition at all times. You will often need to attach your own shop made sub-bases to fit jigs or templates, or you may wish to fit the router under a table, so the base needs to be drilled and tapped to accommodate these requirements.
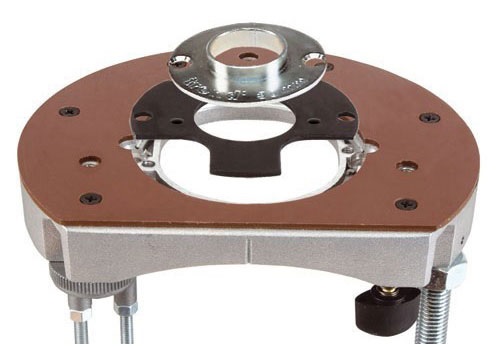
Guide Bush Mounting Points
Template guide bushes can be fitted to most routers and are used to guide the cutter when using a template or jig. Some routers have adjustable centring plates, which enable the guide bush to be centred on the router spindle using a line-up pin that is fitted into the collet.
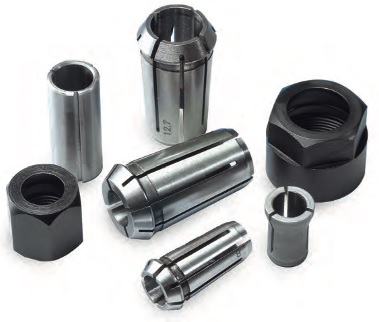
Collets
Cutters are held in the end of the router spindle using a precision ground collet which is machined to take one specific shank diameter only. The collets are available in both metric and imperial internal sizes to suit the range of available cutter shank diameters. Being so size specific, you will have to change the collet to suit each shank. In the UK the common collet sizes are 1/4” and 1/2” whereas the rest of central Europe have settled on 6mm, 8mm and 12mm as the standard.
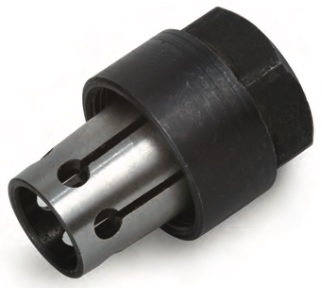
For maximum support the collet needs to have as big as possible surface area in contact with the cutter shank. This is the key to the whole business of cutter security and will prevent any suggestion of cutter ‘creep’, where the cutter gradually moves in the collet during use. Compare the collet sizes from a budget router and a top of the range model to see the difference, the better quality one is at least twice the length of the other. The best collets are made from high quality tempered sprung steel that will withstand constant tightening and un-tightening.
Softer, poor quality collets will quickly wear to a ‘bell mouth’ that reduces both alignment and grip and in extreme cases may allow the cutter to spin in the collet, which will damage both the cutter and the collet. The number of slits in the collet has quite a bearing on its ability to grip. Collets with just a few slits cannot provide a uniform grip on the shank and often won’t release the cutter properly. This problem is exacerbated by the use of poor quality cutters, which may have wide tolerances in their shank diameter. The consequent uneven pressure will mark or burr the cutter shank, leading to other problems. Multi slit collets have an equal number of slits machined alternatively from the top and bottom edges. This produces a flexible cage that grips the cutter shank with firm, even pressure around the full circumference of the shank.
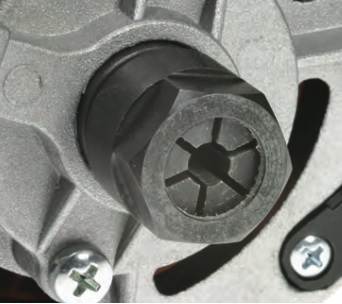
Collet Systems
There are effectively three types of collet, the simplest of which is the one piece system. This screwed collet fits directly into the armature of the motor, the tapered housing squeezing down on the collet as you tighten up. But it does have some limitations, not the least of which is that any damage to the collet also damages the motor spindle so repairs can be expensive.
A more common system is the two piece collet which uses a separate locknut to compress the collet down onto the cutter shank. This is probably the most common system on the lower specification routers and is quite adequate provided you treat it with care. Better machines will have a full length collet with its tightening nut permanently held in place. These are typically made from top quality steel with multiple, long slits for maximum cutter security, and have the advantage that they will release the cutter from the collet as you un-tighten.
Good quality collets are not cheap, but you can convert a big collet to a smaller one using a tubular reducing sleeve, often described as bushing up the shank. Although these are more economical than the cost of a new collet they often fail to grip the shank securely and can result in cutter misalignment. Collet extensions allow the cutter to protrude further from the base of the router and increase the depth of cut, particularly when mounted in an inverted router table. However unless the extension is machined to an extremely high standard, it is unlikely to hold the cutter in true alignment to the spindle axis and may cause vibration. So only use them where absolutely necessary.


 01726 828 388


