✔ Competitive Pricing ✔ Quality Service ✔ Extensive Stock ✔ Experienced Staff


 01726 828 388


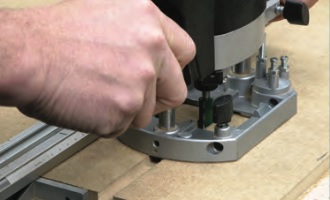
Essential Routing Techniques
Essential Routing Techniques
Edges
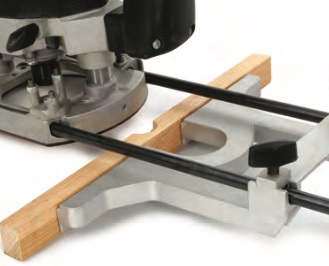
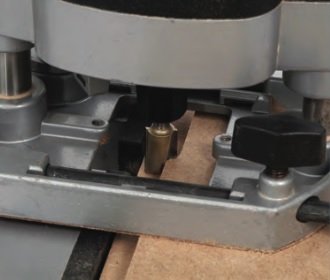
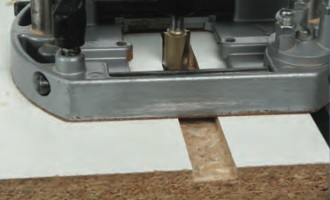
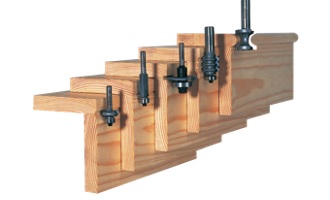
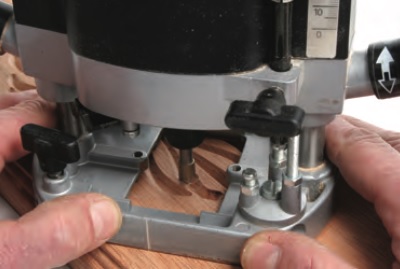
Rebates
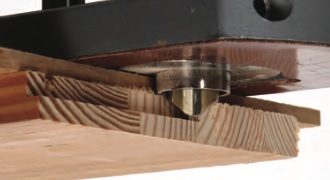
To cut a rebate it is preferable to use a straight cutter which is slightly larger in diameter than the width of the finished cut.
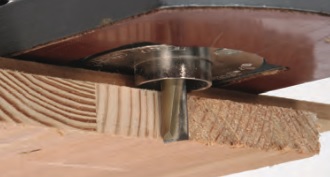
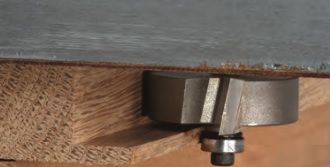
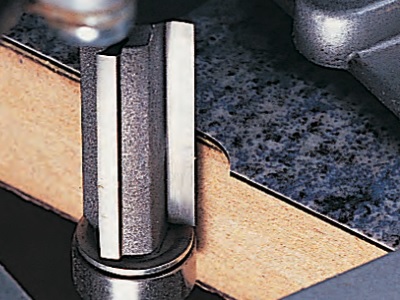
Self guiding rebate cutters are a quicker option and can be used to machine both straight and curved edges. However, the width of the rebate is restricted to the standard cutter and bearing sizes, but you can achieve some variation in the rebate width by changing the bearing diameter. The bearing is simply run against either the edge of the work or against a template which is attached above or below it.
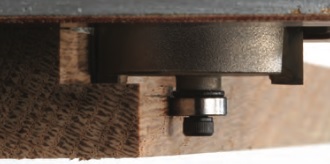
The final depth will probably once again need several passes, but check that there is still sufficient edge width left for the bearing to run on.
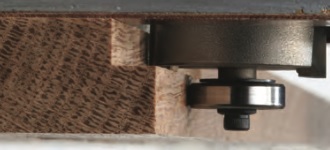
You need at least 1/16” in most timbers, although some species with a very heavy grain structure may require a wider support.
To give the bearing enough clearance, the workpiece should be clamped overhanging the edge of the workbench. If this is not possible, raise it up using a spacer block so that the screw and washer holding the bearing are clear, but make sure everything is held firmly when you start adding layers like this.
Tip. Although not essential, a fine fence adjuster does make precise setting for operations like rebating, very much easier.
Find rebating router cutters here.
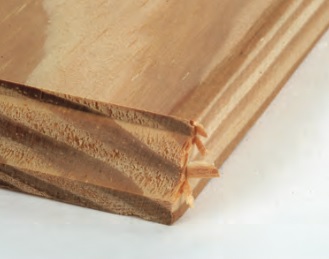
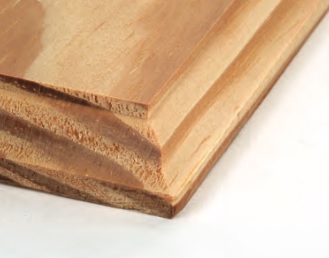
Mouldings
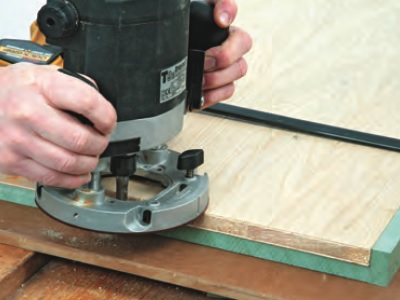
The same procedures can be used to apply decorative edge mouldings, but in this case it is even more important that the edge of the work is properly finished square and smooth, as any irregularities like chips or ripples will be mirrored by the fence and especially by a bearing.
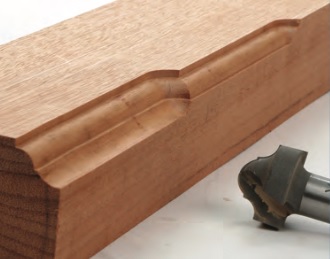
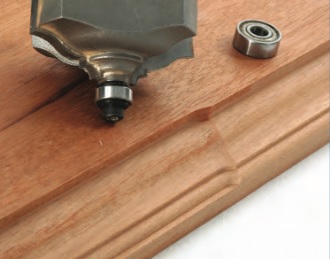
You can make considerable variations to the profile produced by some cutters by adjusting how the fence is positioned relative to the axis of the cutter. Similarly, with self guided cutters, changing the bearing to a different size will also vary the profile and as usual, make several passes for deep cuts.
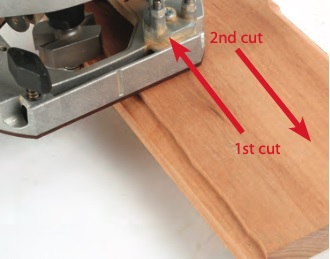
To minimise tearing and burning, you should try to maintain the correct feed direction, but if the grain of the work is distinctly angled it may be better to roughly remove the bulk of the waste working the ‘wrong’ way and then finish off with a light finishing cut in the ‘correct’ direction to even it all out. However, caution is required when using this technique.
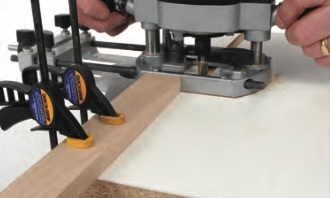
For all edge moulding work it is very important that the work is held securely, and you can usually clamp it so that at least one edge extends beyond the workbench.
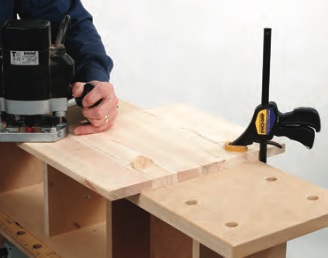
Alternatively, use a router mat to prevent the work moving around. This is a better option provided you are not making very heavy cuts, as there are no clamps to obstruct the path of the router. Smaller pieces for edge routing are sometimes more difficult to hold and you cannot rely on the router mat to hold it firmly enough to prevent kickback. One solution is to stick it temporarily to a larger piece of scrap wood, using either double-sided tape or hot melt glue.
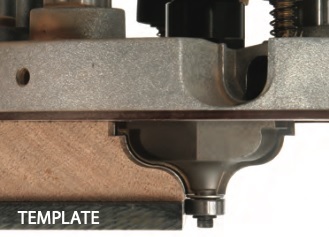
If the required moulding cuts away the full edge face of the work, the router will need to be guided with a guide bush and template in the same way as the rebating procedure outlined above. Alternatively, fit a template to one side of the work and then use a bearing guided cutter.

Curved and irregular shaped edges can also be moulded or rebated using plain cutters, but now guided by an edge follower. This handy little device is attached directly to the side of the router or the side fence rods and consists of a small diameter wheel at right angles to the axis of the cutter. This then acts as a fence to run against either the edge of the work or a template mounted beneath it.
Find edge mould router cutters here.
Grooves
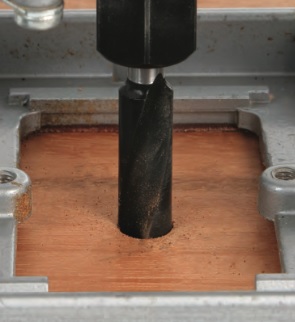
Grooves are just slots in the face or edge of pieces of timber and are usually cut as a means of jointing them together. Although they are essentially the same thing, a cut made parallel with the grain is usually referred to as a groove, whilst one across the grain is called a housing. A typical application for a groove is to locate the panel in a framed construction, or a drawer bottom.
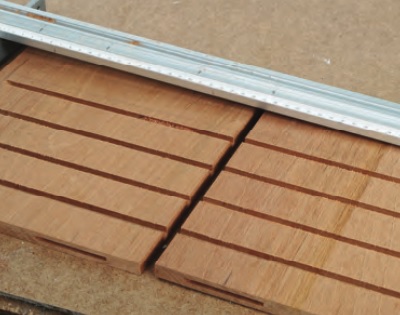
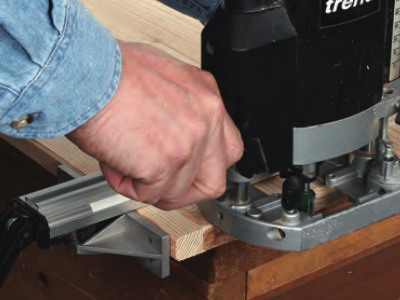
It is very important that the work to be grooved is securely held before you attempt to make the cut, as there is little scope for cleaning up if the cut wanders off line. Straight grooves near the edge of the work can be cut using the side fence as the guide. However, as with the edge moulding, consider extending the fence to minimise run off problems at the start or end of the cut. If you’re making a stopped groove, you can either plunge the cutter in and out at marked pencil lines, or for more reliability, clamp on temporary stops.
Grooves cut further in from the edge of a board will require the use of a straightedge, either in the form of a timber batten and two G clamps, or one of the purpose-made straight edges with built-in clamping facility. If the groove is wider than the largest cutter you have, it can be enlarged by making two or more parallel passes. Always make the first cut closest to the edge guide, cutting in stages right down to full depth, and then adjust the fence to widen the groove by the required amount.
Wide boards can be very effectively jointed by gluing a loose tongue into grooves cut along their edges.
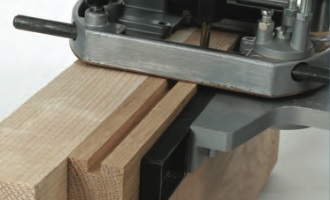
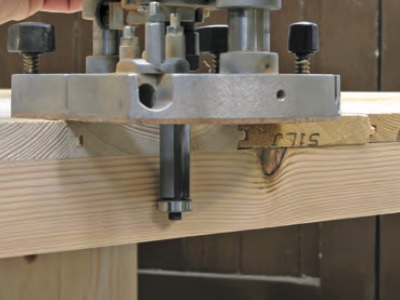
This can be achieved using a standard straight cutter and guide fence with the workpiece clamped on edge, but some additional side support will be necessary to stop the router tipping if the edge is very narrow. Alternatively, using two side fences will usually provide the necessary extra stability. A better method of cutting edge grooves is to use a slotting cutter mounted on an arbor, as this allows the work to be held flat and therefore provide more stable support for the router base.

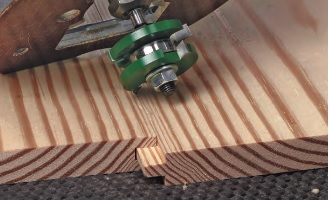
The depth of cut of the groove is controlled by the diameter of the guide bearing fitted to the arbor. It may be necessary to limit the depth of cut for the initial passes on difficult timbers by mounting the side fence. This is then removed to achieve the final depth. A variation of this idea is to mount two cutters on the same arbor, and use this combination to cut the classic tongue and grooved joint.
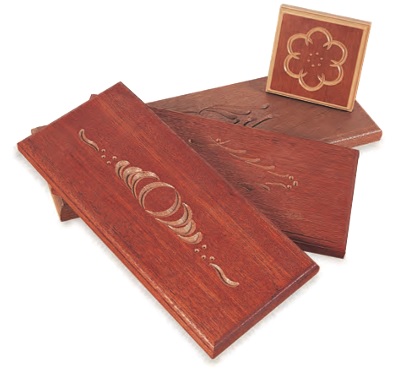
Butt jointing has never been the most attractive or effective way of fixing one square piece of wood to another. The natural and inevitable expansion and contraction of timber will always distort a butt joint leaving an irregular line. One way of overcoming such a problem is to exaggerate the joint by creating a mould or profile along the joint line, helping to disguise any overhang, bowing, wavy or damaged edges and make the joint look consistent. The following picture shows just a few examples of how this can be achieved.
Housings
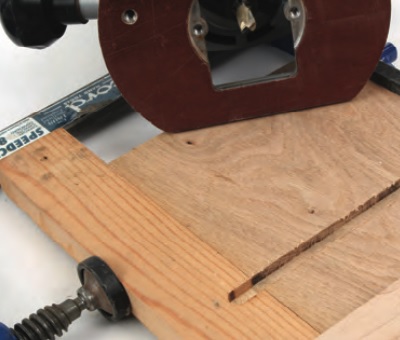
Housings are usually bigger than grooves and are used for more constructional purposes, for instance, to fix shelves into bookcase ends. By definition, housings are nearly always cut across the width of the work so you cannot always use a guide fence. In this case, you will again have to resort to using a straightedge, though, if this is a regular requirement, it is worth making up a dedicated housing jig.

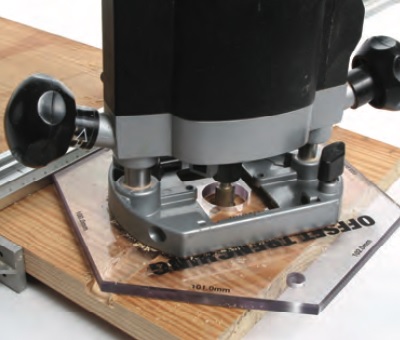
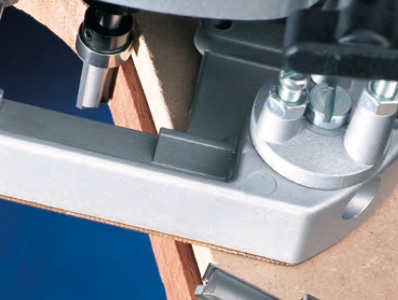
Offset Base
An offset trenching base is another very quick way of making different width grooves using a single cutter. As the name suggests, each edge of the base is offset by different amounts from the centre hole, so by varying which edge is used up against the straightedge, you can get an instant offset off up to 5mm in 1mm steps.
If the housing runs right through the width of the board there is always the problem of spelching on the rear edge where the cutter breaks through. Avoid this by clamping a waste piece against the back edge and running the cut through into it, or alternatively, cut all housings first and then run a plane along the edge to clean up the break-out.
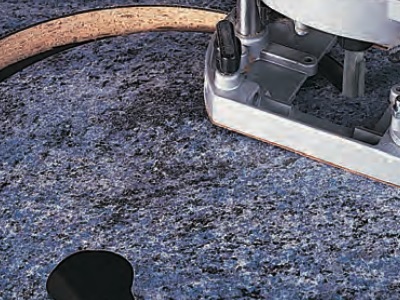
Circles and Curves
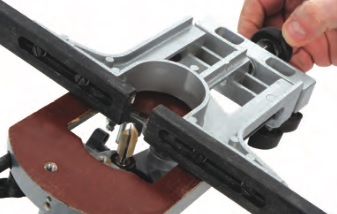
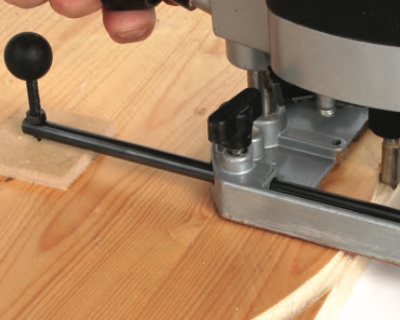
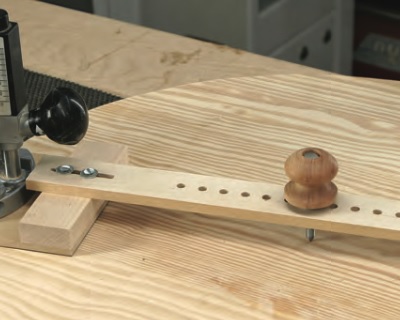
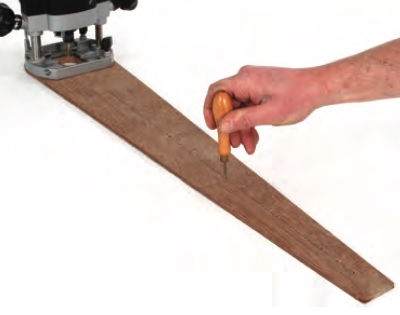
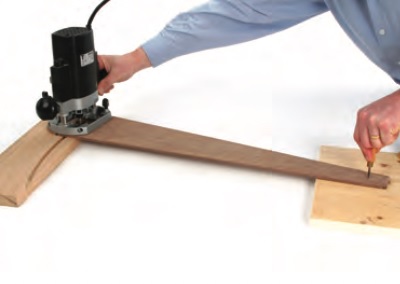
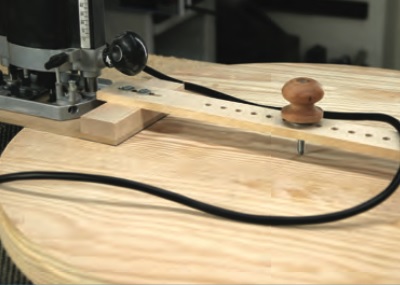
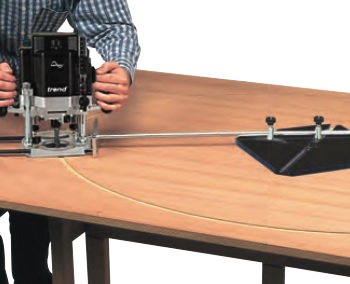
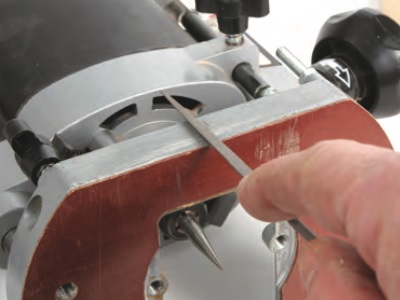
The router is the ideal tool for cutting and moulding clean and accurate circles and curves. If they have a constant radius the curves can be cut by pivoting the router around a fixed point using an adjustable trammel. The trammel consists of a rigid rod carrying an adjustable centre point that locates in or on the surface of the work, allowing the router to be swung round in an arc.
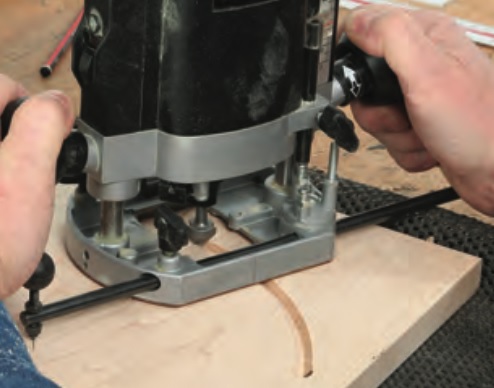
The simplest of the trammels is a single rod fitted into the base of the router and held in place by one of the fence bar clamps. You can even make your own by drilling a hole through the end of one of the fence rods and then using a nail as the pivot point. Alternatively, you can buy an attachment point to fit over the end of a fence rod, this slightly more sophisticated arrangement allows the point to be raised and lowered above or below the base of the router.

To set the radius of the circle or arc, the cutter flutes are lined up with an axis taken from the centre of the cutter to the trammel point. To cut internal circles and arcs the cutter diameter is deducted from the radius. For external circles and arcs, the cutter diameter is added to the radius. In both cases the radius is set between the trammel point and the nearest cutting edge. With some jobs, the trammel can be located in place by simply pressing the point into the face of the work.
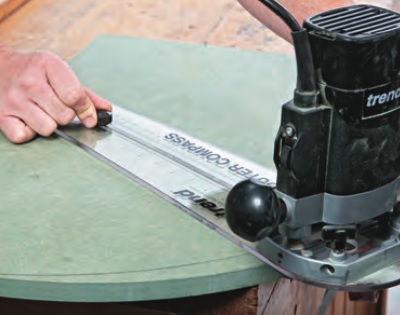
On more decorative work, where you don’t want to spoil the surface, the point can be located into a thin piece of scrap timber secured to the work with double-sided tape. If the required radius is much larger, a single rod trammel will probably not be rigid enough and may flex in use, causing variations in the radius of the curve as the router is swung around. For maximum rigidity, these larger diameter circles are better cut using either a twin rod trammel or a flat beam version that incorporates a sub-base for the router.
Made of clear acrylic plastic, it has a sliding fulcrum that runs in a central slot with a graduated scale, which allows precise radius setting. The whole thing fits directly to the base of virtually any router. The width of support provided by this arrangement prevents any tipping and allows for a super accurate cut. You can easily make your own version of this trammel using MDF or Perspex, with a pin or bradawl driven in the work at the required pivot point.
When you’re using a trammel the router must swing smoothly, so ensure that the centre point is securely located and only feed against the rotation of the cutter. This braces any side force along the trammel rod axis, rather than pulling away from the centre, which could possibly dislodge the centre point. Be aware though that the correct direction of cut is not always obvious, but if you remember to work anti-clockwise round the outside, and clockwise round the inside, you should not go far wrong.
To Illustrate this, consider cutting the curve on the top of a door panel. This is an outside shape so you need to cut anti-clockwise. However, if you’re cutting a hole in the front of the door this is an inside shape, and the cut needs to be in a clockwise direction. Of course, the centre point of the trammel is not necessarily always located on the work itself and for the very large curves the pivot point can be rigged up on a piece of scrap mounted elsewhere on the bench. Be careful that the point of the trammel does not enlarge the centre hole as you work, as this will spoil the accuracy and prevent the cut matching up perfectly when you complete the circle.
Cutting a complete circle is quite straightforward, though one of the biggest problems is keeping the cable out of the way, so ideally, support it from a hook in the workshop ceiling. In order to maintain a smooth and steady movement, swing the router as far as you can until your arms start to cross and then quickly swap them over to complete the cut, trying not to stop completely during the changeover, or you will leave a tiny burn mark.
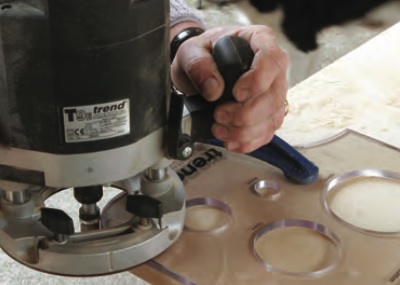
The problem with all these trammel bar arrangements is that the smallest radius you’re able to cut is determined by the router base size, which may be too big if you want to cut small diameter circles. One alternative is to buy a hole template that is predrilled with holes of various diameters. You can use this either with a straight cutter and guide bush, or by using a template profile cutter which has a top bearing. If you’re making repeat cuts using the same centre point, it may be better to replace the sharp trammel with a small diameter rod that locates in a matching hole drilled in a pad that can be stuck temporarily to the bench or the work. Although the pre-drilled holes are of fixed diameter, a variety of other sizes can be obtained by varying the combinations of cutter, bearing and guide bush.
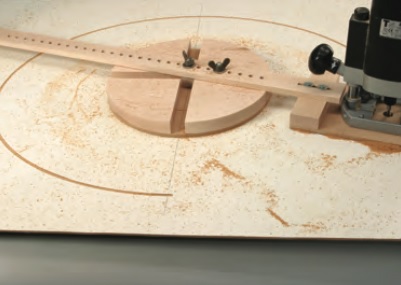
Ellipses
Trammels are not restricted to fixed radius cuts, but can also be used for cutting ellipses or ovals allowing you to make table tops, decorative cut outs, or to make openings in mirrors, picture frames etc.
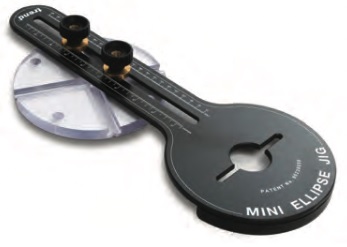
With these jigs, the trammel arm is pivoted about two points, which slide in slots cut at right angles to each other on a centre plate.
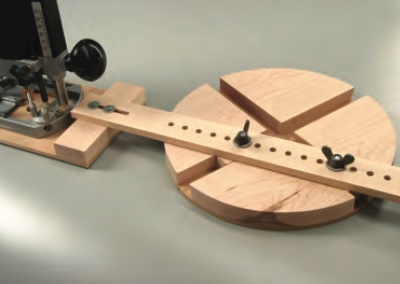
This centre plate is attached to the workpiece and the pivot points are set out to represent the length of the major and minor axes of the ellipse. The router is then guided round the plate to cut the ellipse.
You can buy ready made jigs in various sizes which can adjusted to perform any type of ellipse cutting, or alternatively you can make your own. Theoretically, as both pivot points are held securely in the slots, the router can be moved in either direction, as there is no danger of them becoming dislodged. Cutting the wrong way, i.e., feeding with the direction of cutter rotation can be beneficial in some timbers as it minimises break-out and leaves a smooth and clean edge finish. However, make sure you have full control of the router as it can snatch doing this and may damage the cutter and/ or the work.
Drilling and Boring
The plunging facility of the router is designed to enter the work at a perfect 90 degree angle and this combined with the speed of rotation will produce perfectly accurate and clean cut holes, provided you use suitable cutters.
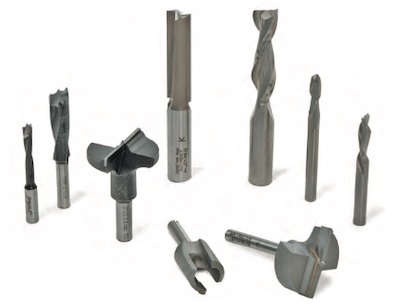
You cannot use normal wood drills because their flute design is not suitable for the high speed rotation of a router, but there is a range of special-purpose bits just for router use. These include straight bits, dowel drills, plug cutters and spiral bits, along with more specialised tooling such as hinge sinkers. However, many of these bits are designed to work at a specific speed, so you will need to use them with a variable speed router. Always follow the manufacturer’s recommendations. Any cutter that is used for boring must be ground with bottom cut and ideally have a clearance angle of approximately 20°. Whilst this is relatively easy to achieve on HSS cutters, it is more difficult on small diameter TCT ones. For this reason solid TC cutters are better if you need to cut clean, small holes without burning. However, straight fluted standard cutters may have problems clearing the swarf, particularly on deep cuts, in which case up-cutting spiral versions are preferable.
Tip. No matter what cutter you’re using to drill with, it is usually better to plunge in stages, raising the cutter between each cut to help clear the waste. This is particularly important with large diameter cutters.
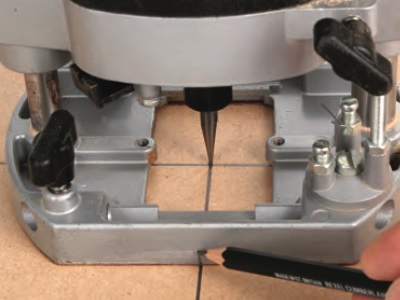
The main problem of using the router for drilling is that it is difficult to centre it accurately. Some cutters actually have a central spur which makes alignment much easier, but it is not so easy on standard square ended cutters. Overcome these problems by scribing centring marks on the base plate of the router which can be lined up with centre lines drawn on the workpiece. Some routers may actually have the centre marks cast in the base by the manufacturer, otherwise mark the router base yourself with this simple procedure...
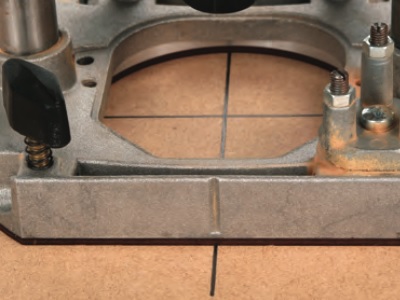
Draw lines at 90° to each other on a piece of flat material. Fit a symmetrical pointed cutter into the collet and bring the tip down onto the intersection of these lines. Square up the router base parallel to one of these lines and then mark the centring points on the router base plate.
To make them more permanent, try engraving them using a small triangular file.
Another way of centring the router is to make a Perspex sub-base. Extend the edges of the sub base beyond the width of the router base to give alternative line up points.
Because the base of the router is deliberately smooth to prevent it marking the work, it is sometimes difficult to hold it perfectly still while you are drilling. Minimise the risk of any unwanted movement by sticking some fine grade abrasive paper to the underside of the base using double-sided tape, but keep it well away from the cutter.

For a more secure location, a better way is to use a guide bush template. For this, drill a hole that exactly matches the diameter of the guide bush in a thin piece of MDF. Scribe the cross lines on this base as before and then clamp it in place over the required drilling point. Now the router can only locate in one place and cannot move.
Add tapered spacers to this template to allow you to drill holes at an angle. However, this arrangement may be difficult to hold in place securely as you start drilling so if necessary, use locating battens that are clamped across the surface of the work .

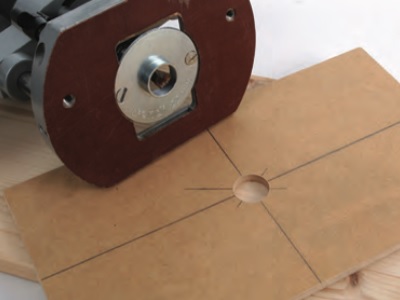
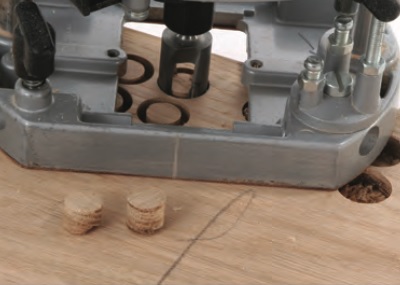
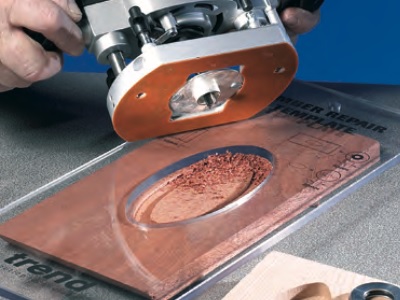
Plug Cutters and Counterbores
If you want to conceal screw heads or surface blemishes, use a counterbore to drill a clearance hole for the screw shank and then countersink or counterbore it all in one operation. Plug cutters can then be used to cut tight fitting pellets from matching timber, which are then glued into the counterbored holes. The plug is trimmed flush with the surface to leave an almost invisible repair.

The counterbore bits have a locating spur which is normally enough for accurate positioning, but a simple locating jig, or template with a guide bush can be used for absolute precision. If you are working on curved surfaces like handrails, a shaped mounting block can be fitted underneath the locating jig.
Ideally, plug cutters should be used in an overhead mounted plunging router, with the waste material being securely clamped to the table. However, if they have to be used in a handheld router, a simple jig can be used to hold the router still while the cutter starts to enter the wood. Use a router mat to prevent the workpiece from sliding out of position.
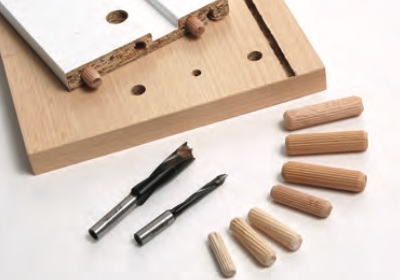
Dowel Drills
Short, slow-spiral router doweling bits can be used in the router up to speeds of 22,000 rpm to produce perfect clean holes, but need to be used with a template for accurate alignment or spacing. They are available in all the sizes to match standard wooden dowels, but the 5mm diameter is particularly useful for drilling holes for shelf supports.
Special templates are available for multiple drilling applications such as this. Used in conjunction with a small diameter guide bush, this is a foolproof method of spacing repetitive holes, though simpler shopmade jigs are very easy to make.
Most of the dowel drills have tungsten carbide tips and can be used on both man-made boards and natural timbers. The concept of drilling with the router can be extended into all sorts of decorative applications. Cutters with bottom cut facility such as V and cove cutters will produce shaped dimples and indentations that can be used to add surface decoration to furniture and panel work.
Carving
With its ability to remove wood quickly and cleanly, the router is an obvious choice for a range of wood carving functions. However its use for freehand carving is mostly confined to small routers with de-mountable bodies which accept burrs and rasps.
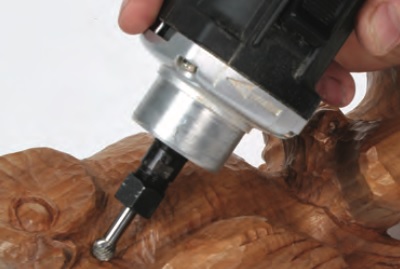
Trying to use conventional cutters for carving with the router handheld would be extremely dangerous, as you are unable to control any snatching or kickback. A variation on this is a dedicated carving machine in which single or multiple routers are mounted in a large frame and all the routers are moved simultaneously by tracing a guide stylus over a three-dimensional master pattern. In this case the routers are held securely so they can be fitted with conventional cutters for quick stock removal.
However, the handheld router is superb for relief carving when you want to add some decorative detail to panels or drawer fronts. You can do this freehand using the tip of a cutter to follow a marked line. The larger the cutter you use, the more erratic the progress of the router will be. But you can get better control, particularly if there are knots or grain variations in the timber, by holding the edge of the router base instead of the side handles, steadying your hand on the work and pushing it gently along each line to achieve the required designs. Patterns can be drawn directly onto the work or onto paper, which can then be stuck down onto the work surface. As the cut is relatively small and shallow, there is little chance of burning, even if you work slowly, but the quicker and more fluid you can get the movements, the smoother the resulting surface will be.
Other letter carving or sign writing systems rely on following letter and number templates using a pantograph arm, or by adopting standard template and guide bush procedures.
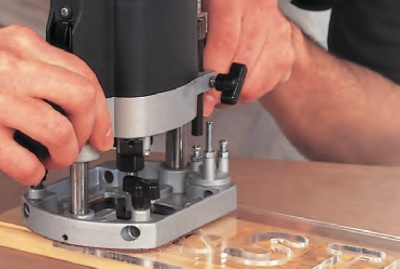
Inlaying
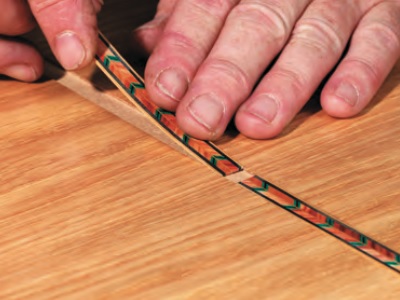
Inlaying is another very common woodworking operation, either for decoration with banding and strings, or for setting in various types of hardware such as hinges and escutcheon plates. This job is ideally suited for the router with its ability to cut perfect, even depth recesses in both straight and irregular patterns.
Straight line inlays are usually used as decorative edging on flat panels and are set into very shallow grooves cut with a router bit equal in width to the inlay strip, but cut to a depth slightly less than the thickness of the inlay. This type of cut is easily produced using the standard edge guide on the router, or by using a straightedge in the conventional way.
For more continuous use, special inlay cutter sets are available, and although these have a limited number of widths, they are supplied with different diameter bearings to vary the depth.

However, inlay bandings and strings are not limited to straight lines and you can apply the same principles for curved work, guiding the router with a trammel, circle cutting jig or by just cutting freehand. If the inlay is following the edge of a tabletop for instance, it is simpler to use an edge following device, or make up your own from a block of wood shaped with the curve to match that of the workpiece. This is simply held on the router base with double sided tape or screwed to the side-fence. Inlays may also be shaped in the form of motifs, often round or oval. Again, the shapes can be cut freehand, after tracing around the outer edge of the inlays, or for more regularly used motifs, make a suitable template and use this in conjunction with a guide bush in the router.
A very handy technique is to use two different sizes of guide bush with the same template and cutter, enabling you to cut both the inlay and the required recess for it to fit into. As well as insetting decorative detail, this technique is also useful as a means of patching over surface defects such as bad knots. The size relationship between the cutter and guide bush for this technique is as follows: Outside diameter of large bush minus the bit diameter equals the outside diameter of the smaller bush plus bit diameter. The larger of the two guide bushes is used to remove the groundwork leaving a recess of a suitable depth for the inlay. The smaller diameter guide bush is used to cut theinlay itself which is then a perfect fit in the recess.
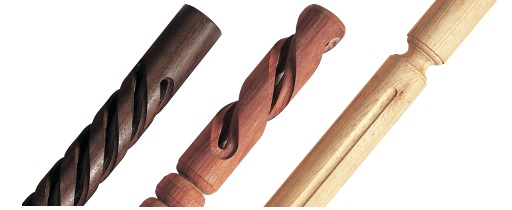
Router Lathes
The router lathe is useful for three dimensional work, like turning spindles and columns, or tapering and fluting on round, square and faceted workpieces. It also is used for cutting barley twists, spirals and diamond fluting.
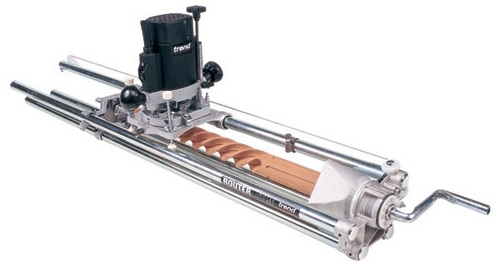
The router lathe is actually an extremely versatile device and when used with a variety of different profile cutters, is capable of producing some highly decorative effects, albeit rather slowly. An alternative way of adding straight fluting and beading to an existing turned workpiece is by using a box jig, which may be freestanding or designed to fit over the wood turning lathe. They are very straight forward to make up as a one-off to suit the particular job in hand, though it is not difficult to build a universal box jig with built in height adjustment that can handle a variety of different workpieces. Whatever you are doing with the box jig, it is usually necessary to make several trial cuts to check on the various depth settings, so always make an extra workpiece for this initial experimentation.
Trimming
In routing terminology, the term trimming means removing a small amount of surplus waste to produce a finished dimension, or to cut back an overhang of laminate or veneer. The cutters are usually of the self guided bearing type with the majority of them being straight, but for laminate work some are angled to provide the necessary bevel where two surfaces meet.
Sometimes a bevelled edge is preferable to a square one to give a more pleasing appearance.
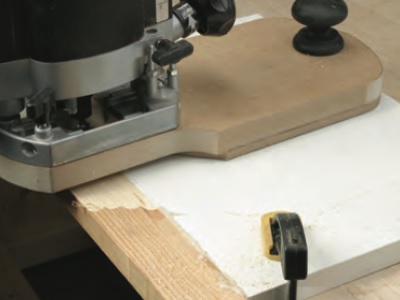
A basic square trimming guide is an essential routing aid that can be used in one of two ways. Use it to clean up the end of boards using the guide as a bearing surface for the router base to run on. Use a standard straight cutter.
Alternatively, you can set the guide with only a tiny amount of amount of offset from the end of the board and use it as a template for a flush trimming bit with a bearing.
These flush trimming bits can also be used freehand to cut back any overhangs on assembled joints. This trimming technique is perfect for squaring the ends of wide boards as it is almost impossible to cut them perfectly unless you have a proper dimension saw. Instead, cut them slightly oversize and then trim back using a straightedge or jig to get a perfect cut without any break-out or splintering, even on veneered panels.

Some trimming jobs may be made easier by positioning the guide templates on top of the work, in which case use a cutter with a shank mounted bearing. Changing the diameter of this bearing allows the component to be routed oversize relative to the template, often handy when making jigs or patterns which need some guide bush margin.
For laminate work, standard bearing cutters can be used to trim back a maximum of
3 mm overlap. But always make sure the laminate adhesive is properly dry before trimming, to avoid clogging up the guide bearing.
There are self guiding trimmers that have no bearing at all, but rely on the diameter of the shank to do the guiding. Pierce and trim cutters allow laminate to be cut back to an existing opening and some are designed for trimming both top and bottom faces simultaneously. 90 degree trimmers are slightly different in that they work from the face of the work and are used for flush trimming hardwood or plastic edge strip to match the existing surface without scoring it.
Find trimming router cutters here.
We stock a wide range of high quality Routers from top brands such as Trend, Festool, Mafell, Metabo and more.


