✔ Competitive Pricing ✔ Quality Service ✔ Extensive Stock ✔ Experienced Staff


 01726 828 388


Buyers Guide to Dust Extraction
Dust Extraction Buyers Guide
Everyone involved in wood working is now well aware of the risks associated with breathing in wood dust, making dust control an essential part of any workshop. Wood chips and shavings are more of a nuisance than a health risk, but collecting them is required when using certain types of machinery. If nothing else, it makes tidying up after a day in the workshop a much simpler task. There are 2 different types of extractor: Vacuum & High Volume.
Below are examples of 3 different models.
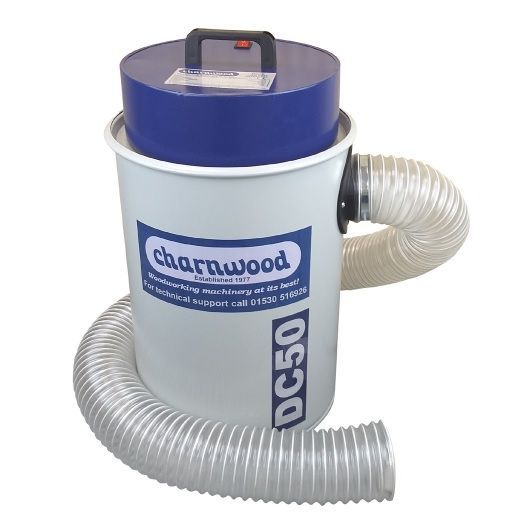
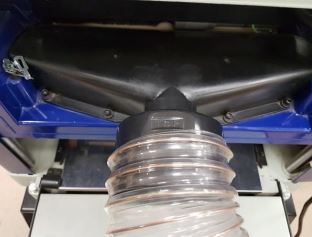
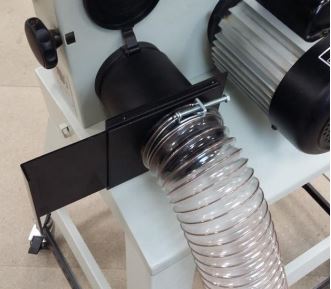
DC50 - Vacuum Dust Extractor

What Type of Extractor Should I Use?
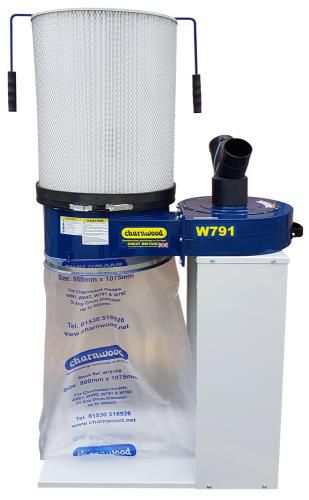
* A typical home workshop would most likely choose between DC50 and W696. A larger home workshop or commercial workshop would also consider the W791CF. Each type has pros and cons and it completely depends on your workshop setup as to which is most suitable for you.
* A vacuum extractor uses a brush motor to turn a fan, creating a vacuum inside the metal drum which makes up the body. Air rushes into the low pressure area pulling with it dust, chips and shavings. The air then passes out of the drum through a 2 stage filter, leaving the dust behind. To empty them, the lid and motor unit is removed and the drum can then be emptied out into a wheelie bin or a plastic bag. There is no collection bag inside the drum, so it can get a bit messy.
* A high volume extractor works on a different principal, using a large impellor to generate an airflow. Air flows down the hose, pulling dust and shavings with it, passing through the fan and then into the plastic collection bag. The air then passes out through the filter material, leaving the dust behind. The standard diameter of hose used with these machines is 100mm. When you put your hand over the end of the hose it will not feel as powerful as a vacuum type: do not be fooled by that, these extractors work by shifting a bigger volume of air and are very effective.
* If you predominantly use power tools, a vacuum type of extractor works best as they can run through a narrow diameter hose, commonly 38mm, without any loss of suction.
* If you only have larger woodworking machinery, such as a table saw, bandsaw and planer, then a high volume extractor will work best.
* If you have a mix of smaller bench top and larger machines then there is no clear answer as to which performs best. If you have the space for it, a high volume extractor will usually be the winner thanks to the much lower noise level they produce.
What Filtration Level Do I Need?
* A typical hobby level high volume dust extractor will be supplied with a cloth filter, with a rating of 5 microns. That means it will filter out 99% of dust particles at 5 micron size or bigger. It will also trap some smaller particles too but to a lesser level, so at 1 micron it might only be 50%.
* A 5 micron filter is actually sufficient for collecting from machines such as Table saw, Bandsaw, Planer Thicknesser, Router, Spindle Moulder, Mitre Saw & Lathe when cutting softwood or hardwood.
* When working with MDF, or when sanding, a higher level of filtration is recommended of 2 microns. Again it will filter 99% of dust particles at 2 micron size or bigger.
* The highest level of filtration currently available is 1 micron. These filters use a card like material supported by a metal cage. They are pleated to increase the surface area of the filter to maintain the same flow rate as the cloth type filters.
* Most extractors can be upgraded at any time to a finer filter.
* Vacuum extractors have a 1 micron filter fitted as standard.
* If you notice a gradual deterioration in the performance of your extraction system, the most likely cause is a clogged filter. It will need to be cleaned or replaced, depending on what type it is. If the air cannot easily pass through the filter, it will not be drawn down the hose.
Mobile Or Fixed Installation?
* The first thing to decide is how best to use the extractor.
* For the smaller one person workshop, it is most common to use the extractor as a portable unit. Moving it around the workshop and simply connecting the length of hose to each dust producing machine as you use it.
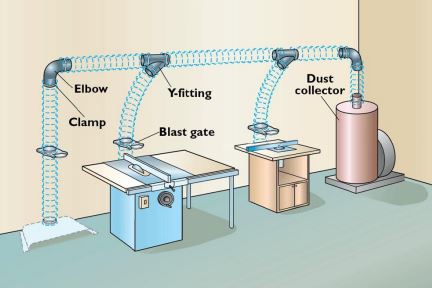
* The other option is to site the extractor in a fixed place in the workshop and create a branch system of hoses which are permanently connected to each dust producing machine. This can be the best choice for workshops where the machines do not get moved around too much. It is the more expensive option, but once installed is the easiest to use and there will never be an excuse for not running the extractor. A fixed installation is almost always used for large extractors, say 2hp and above. The larger physical size makes moving them around just too awkward.
Mobile Installation
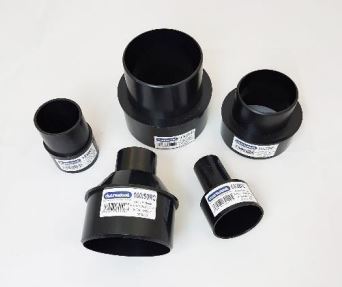
* As the standard hose diameter is 100mm (4”) it works best if all the machines you connect to, are converted to a 100mm diameter outlet.
* A range of Reducers are available to convert bench top machines and power tools to 100mm. They can be fitted over the outside or on the inside of the existing outlet. Carefully measure any outlets you have which are not 100mm and check the table for the best fit. If nothing seems to do the job (or the outlet is not round) there is the option of heat shrink sleeve which can be used on any outlet from 38mm to 100mm diameter.

* Once you have converted all your machines to 100mm outlets, you then need to make it fast and simple to move your hose from one machine to another. We are always in a hurry and sometimes connecting the extractor for a job which takes 5 seconds, just does not seem worthwhile.
* Using a quick push connector or quick action hose clamp will greatly increase the chances of making the effort to connect the extractor to the mitre saw just to trim down a small work piece.
* When buying a quick push connector, firstly check which direction the wire helix in the hose runs. Imagine the end of the hose is the nut and the quick push connector is a bolt, which way would you turn it to screw it in. Hoses are available in both right handed (the normal way!) and left handed versions from different manufacturers. Hoses supplied with machines (foreign made) are most often left handed. Charnwood hose, sold by the metre, is UK made and has a right handed thread.

Fixed Installation
* Installing a hose network around the workshop can be a really great solution. It keeps the workshop tidy and minimises the risk from trip hazards, such as a length of hose lying in an unexpected place.
* An important consideration is what length will the maximum hose run be? Extractors have a maximum recommended hose length. You can exceed it, but the further you go, the less efficient the extractor will become. The chart below assumes you will be using 100mm diameter hose.
-
Vacuum Extractor up to 1100w (1.5hp) = 10 metres recommended min' length of hose (must be airtight, Vacuum extractors need to create a vacuum inside the hose, therefore any gaps or air leaks will impair the performance.)
-
High Volume Extractor up to 750w (1hp) = 3 metres recommended min' length of hose
-
High Volume Extractor up to 1500w (2hp) = 7 metres recommended min' length of hose
-
High Volume Extractor up to 2200w (3hp) = 10 metres recommended min' length of hose
* If you are using a Vacuum Extractor it is possible to install the hose network using 63mm diameter, rather than the usual 100mm. There are 2 reasons to do this: It takes up less space and it costs less.
Installing Flexible Hoses and Tubes
* Flexible hoses are sold by the metre. Design your network and measure up the length of hose you need. Buy the hose in a single length and then cut it down yourself, just using a craft knife and a pair of side cutter pliers.
* If there is a long straight section you could use clear tube instead of flexible hose. Clear tube has a smooth internal bore and helps to keep the airflow higher, increasing the overall performance.
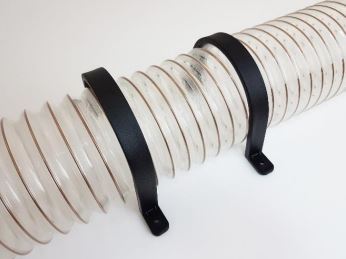
* To join 2 lengths of hose together: use a Hose Splice and 2 Hose Clamps.
* To join 2 lengths of clear tube together: use a push fit connector sleeve.
* Flexible hose will join straight onto the clear tube, fastened with a hose clamp.
* To go around a 90 degree corner, you can just bend the flexible hose, but using an elbow will give a better air flow and increase the efficiency.
* Hoses or tube can be fixed to the wall or ceiling of the workshop using a series of wall hangers or J hooks. J hooks allow easy removal of the hose.

* The usual way to configure a hose network is to run a hose along the wall of the workshop, at waist height or whatever is most convenient for your layout, from the extractor to the furthest piece of machinery to be connected. Then insert a Y-Piece or T-piece at points where you will branch off to other machines.
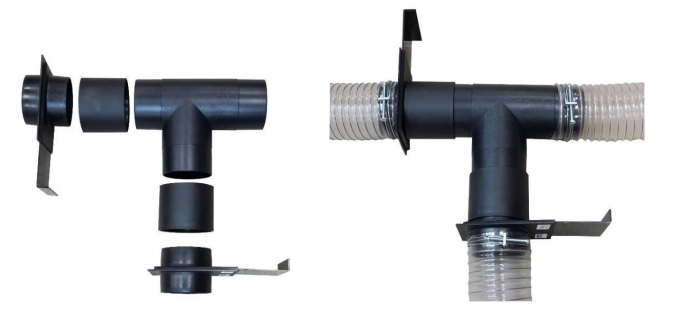
* Hose will join directly onto a Y or T piece, secured with a clamp. Clear tube can be joined onto a Y or T using a connector sleeve.
* The next thing to add is a blast gate. You need to include a blast gate in each branch. The gate is used to block the air flow down the unused branch, creating a higher air flow down the active branch. When wall mounting the gate has its own bracket. When joining a gate directly onto a Y or T use the quick connect gate version which will push fit straight on. The next length of hose is then secured to the gate using a clamp. Depending on the size of the machine and the position of the dust outlet, it may be easier to locate the blast gate directly onto the outlet of the dust producing machine.
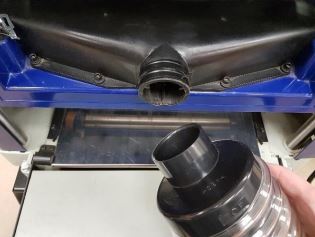
What About Machinery Without A Dust Port?
* A range of plastic dust hoods can be used for this purpose or as a simple way to adapt a home made funnel to attach the hose to it. Most woodturners will at least use dust extraction when sanding, if not at all times. Positioning a hood just behind the lathe will create an airflow which will draw the finer airborne dust into the extractor.

How About Cleaning Up The Workshop?
* The end of the hose can be used for collecting dust, chips and small offcuts from the floor of the workshop or from the work bench. It can also be used for cleaning down machines.
* Adding a nozzle to the end of the hose makes that work better. You can use a simple vacuum cleaner type nozzle or something a bit more sophisticated.
* The other option is to bring the dust to the extractor by using a floor mount dust hood. The dust hood is connected to a hose branch from the extractor. Turn the extractor on and use a brush to sweep the chips into the mouth of the dust hood.
Do I Need Additional Protection?
* Even the best extraction system cannot capture 100% of the dust in the workshop. Some dust will always go air borne and float around the workshop. Everybody has probably experienced going to the workshop in the morning finding a fine layer of dust has settled on flat surfaces overnight. This air borne dust can be removed with an air Cleaner. They are designed to either sit on a shelf or be suspended from the ceiling, quietly filtering the air in the workshop up 10 times per hour, removing the really fine dust which you cannot even see. No more dust settling overnight.
* When creating particularly fine dust, which is basically when sanding, the use of a face mask is also a good idea. They can be disposable or reusable. The reusable type offer a better seal around the face and can also be used when spraying or applying a finish. They can even remove odours.
See our full range of Dust Extractors


