✔ Competitive Pricing                              ✔ Quality Service                           ✔ Extensive Stock                          ✔ Experienced Staff

Facebook Instagram Twitter Email
Pricing  
Westcountry Machinery 4 Wood
Menu
Search
Reset Filter
Price

Kreg Answers to Common Pocket Hole Questions

zz Knowledge Centre > Pocket Hole Joinery > Kreg Answers to Common Pocket Hole Questions

Answers to Common Pocket Hole Questions

The most frequently asked questions about pocket hole joinery.

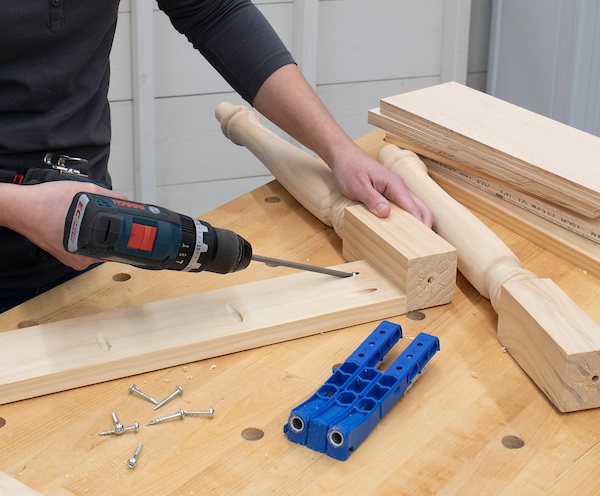
Can you disassemble and reassemble pocket-hole joints?

The ability to put a joint together more than once is one of the great things about pocket-hole joinery. You can assemble and reassemble a pocket-hole joint multiple times. That’s great for test-fitting assemblies, and for times when you want to disassemble a project to simplify finishing. The ability to disassemble and reassemble pocket-hole joints is also great when you want to build a project in your workspace, and then disassemble it to make it easier to move into its final location.
* Don’t install all the screws: If you’re planning to take your project apart later, you may be able to just use enough Pocket-Hole Screws to “hold it together.” Then, you can drive the rest of the screws in during final assembly.
* Don’t overdrive: Any time you drive the screw too forcefully, you can potentially strip the hole that the screw threads into. That’s especially true when you’re installing a screw for the second or third time. Be sure you have your drill clutch set correctly. During reassembly, you can back the clutch setting down pretty low because the screw will thread in easily.
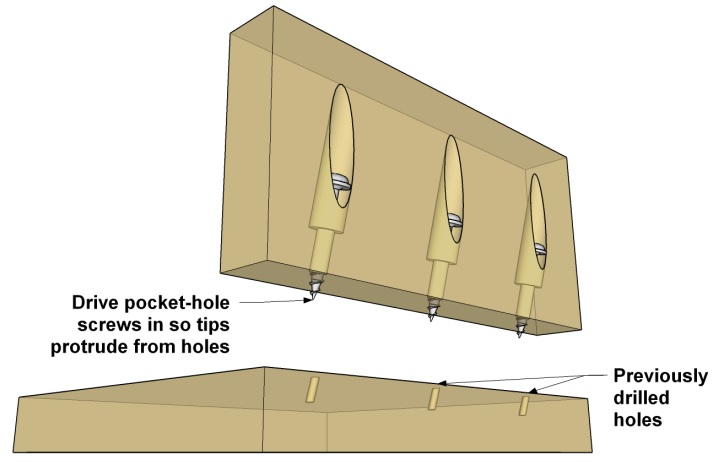
* Use the screw tip as a guide: Getting everything lined up correctly can be one of the hardest parts of project assembly. But when you’re reassembling with pocket-hole screws, you can make it easier. Just drive the screw into the pocket hole so that the tip sticks out of that piece a little bit. Then, when you position the project part, the screw tip will fit into the hole it already made to make realignment easy.

Can you assemble pocket-hole joints without glue?
The simple answer to this question is yes. You can assemble pocket-hole joints without glue. We’ve always said that a joint made with Kreg Pocket-Hole Screws is so strong that glue is optional. That means you can use glue if you want, but it’s not necessary in order to create a strong, lasting joint. There are a few types of joints that can benefit from adding of glue in order to minimize wood movement as follows:
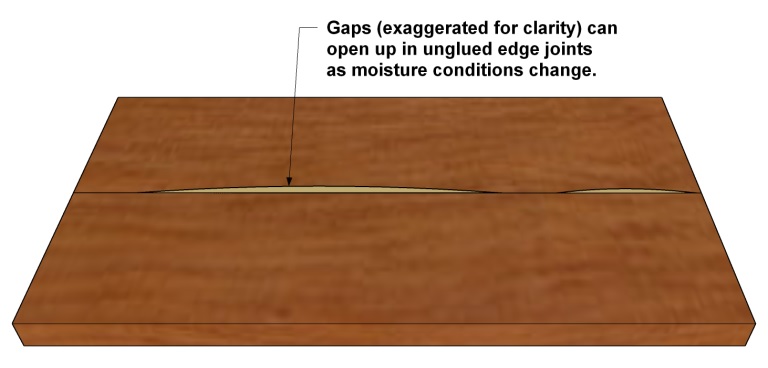
* Solid-wood panels: One time glue can be beneficial is when you’re joining solid wood boards together edge to edge to form a large panel, such as for a table top. That’s because boards expand and contract in width, and a bit in thickness, as humidity changes from season to season. This happens even after finish and paint are applied. As the boards expand and contract, it can cause small gaps between the boards that you may see or feel. Though the screws will still hold the boards strongly together, these changes caused by natural wood movement can hurt the appearance of your project. By adding glue to these joints, you can bond the wood fibers together where the boards meet, which will prevent those gaps from forming.

* Miter joints: Mitered corners, like you’d use when building a picture frame, can also benefit from glue. Once again, seasonal wood movement is the reason. It can cause the miter joint, especially at the tips, to open up. Adding glue to a mitered pocket-hole joint can help prevent this.
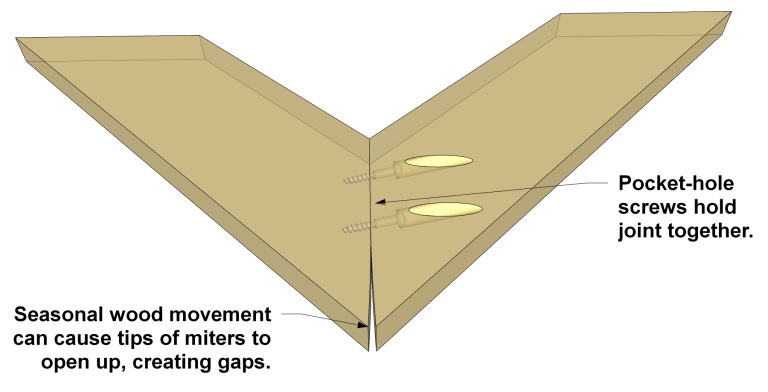
Outdoor projects: Projects that live outdoors face much harsher conditions. Humidity and temperature vary a lot more, and many projects get rained and snowed on. This all makes seasonal wood movement more extreme. Plus, water will find its way into the joints and accelerate deterioration of the wood. Using exterior wood glue in the pocket-hole joints of your outdoor projects will help seal them up, so the joints will stay tight and strong in harsh outdoor conditions.

Find wood glue here


What’s better for projects - pocket holes on the inside or the outside?
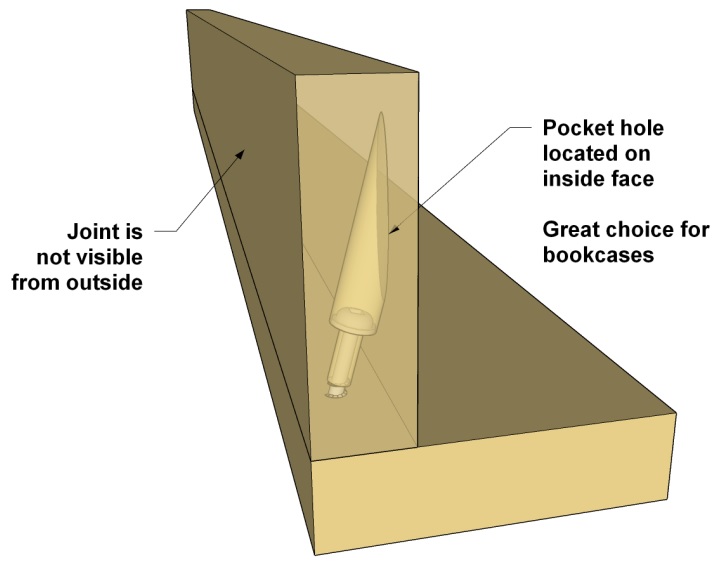
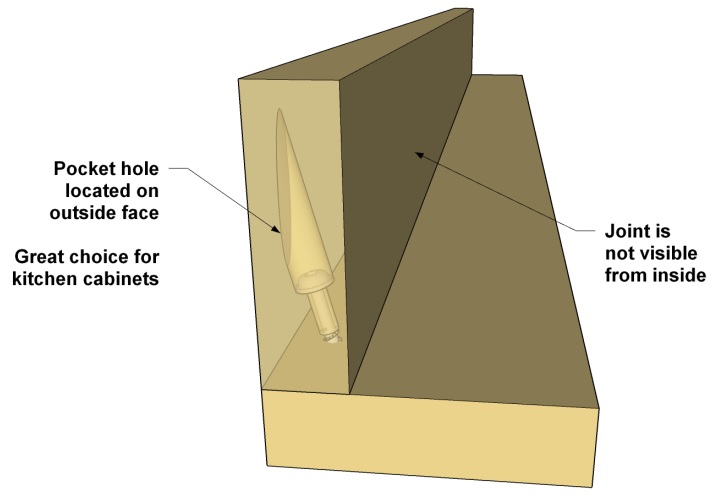
The simple answer is that either way works. Strength is really equal in both orientations, because the screw still enters the wood the same way, and is surrounded by wood in either orientation. The biggest determiner of where the pocket-hole should be located is still where they’ll be the least visible. Here are a few guidelines:
* Inside for cases: On a bookcase or a display case, for example, the outside faces of the case are much more visible. So, it makes sense to put the pocket holes on the inside. Chances are the pocket holes will be hidden even more by whatever sits on the shelves.

* Outside for cabinets: On a kitchen cabinet, though, the outside is usually hidden by adjacent cabinets or by a cover panel. So it makes more sense to put the pocket-holes on the outside, so that you won’t see them when you open the cabinet doors.
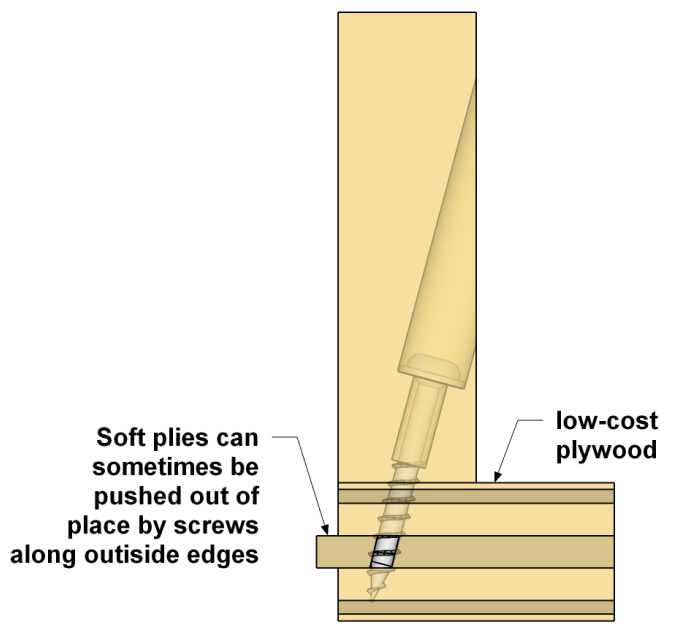
* Outside for low-cost plywood: If you’re building with low-cost plywood, though, you’ll probably want to have the pocket holes on the outside facing in. That’s because low-cost plywood can have voids in the plies, or plies that are brittle or soft. When you drive pocket-hole screws from the inside, the screw tip may actually break away those soft plies and push them out the edge of the plywood. With inexpensive plywood, if the pocket holes are on the outside, the pressure pushes in the opposite direction, and there’s more material to support the inner plies as the screw drives in.

How do you prevent over-drilling and over-driving pocket holes?
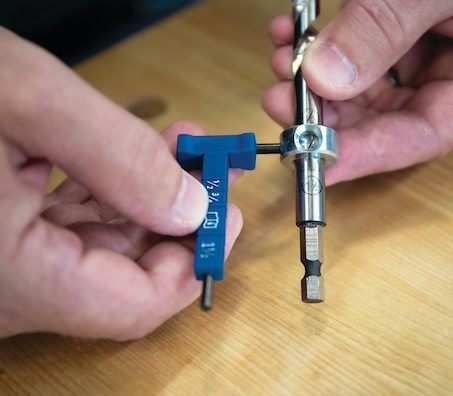
Over-drilling or over-driving pocket holes can be annoying and lead to reworking parts of your project. Fortunately preventing both is pretty easy with a few simple adjustments.
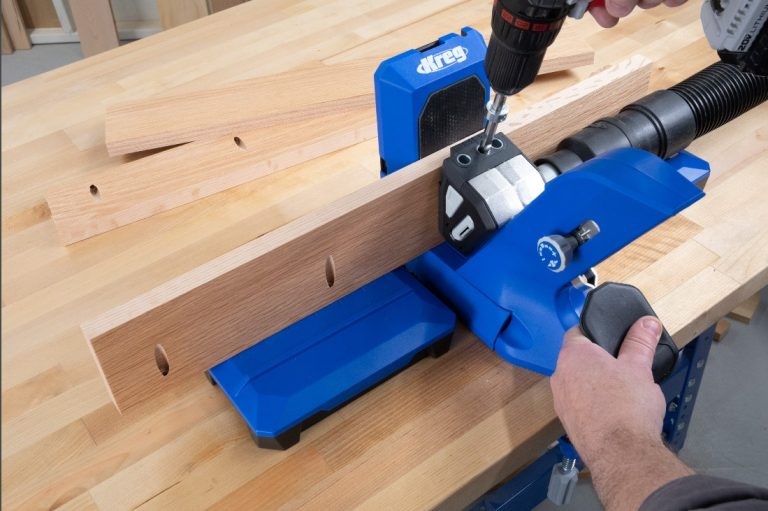
* Preventing Over-Drilling: To prevent over-drilling pocket holes, start by adjusting the drill bit stop collar to the etched marking that matches your workpiece thickness. If you are still over-drilling, loosen and slightly shift the stop collar closer to the cutting end of the drill bit. Tighten the stop collar back down and test the new setup on a piece of scrap wood. Repeat this process until you get the desired result.

* Preventing Over-Driving: Over-driving a pocket-hole screw typically happens when using an impact driver or a drill with the clutch set too high to drive screws. We recommend using a standard drill with the clutch set to a low setting. This ensures that the drill will stop driving the screw when it gets snug in the joint. If you find that your screw isn’t going deep enough, adjust the clutch on your drill to a slightly higher setting until you get a strong, snug joint.


How do you prevent joints from shifting while driving screws?
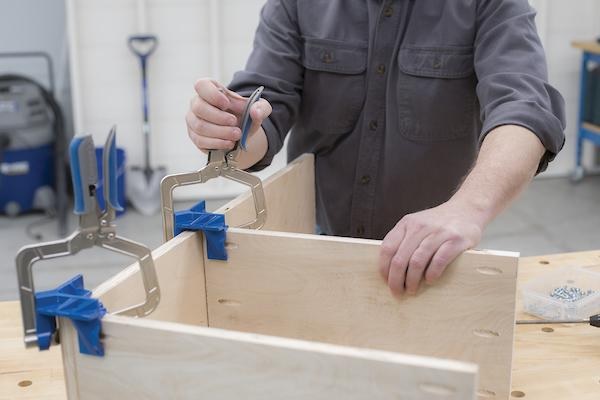
Pocket-hole joints may occasionally shift slightly out of place during assembly as the screw enters the mating piece. This is caused by the screw tip working its way between grain fibers in the mating piece. Kreg screws feature a self-tapping tip to minimize this as much as possible, but it can still happen sometimes, particularly if your two boards are not clamped together.
* Make Assembly Easier With Clamps: Using clamps to hold your two boards in place while you drive in your pocket-hole screws will prevent the joint from shifting in most cases. We offer a variety of clamps to assist with assembling pocket-hole joints. Our Right Angle Clamp and 90° Corner Clamp are perfect for getting rock-solid 90° joints such as box joints or T-joints.

Face clamps handle applications like building face frames or mitered picture frames. These clamps feature a large, flat clamp face to ensure the joint is clamped down securely and pressure is evenly spread across the joint. The large clamp face also helps prevent marring or damage to your workpiece. The best part about using pocket-hole joinery is that once the screws are in place, the clamps can be removed right away even if you’re waiting for glue to dry.

Find clamps here


How do you select the correct screw size?

Choosing the best pocket-hole screw for your project is determined by three things:
1. Will your project live indoors or outdoors?
2. How thick is the wood you’re using?
3. What kind of wood are you using?
Take a look at our Guide to Choosing the Correct Pocket Hole Screw for more help.

Using the right kind of pocket-hole screw is critical to strong, long-lasting joints.

Find Kreg Pocket Hole Screws here


See the full range of Kreg Tools, Pocket Hole Joinery Systems and Screws


No items in this category
Join our mailing list to receive
exclusive offers and discounts