✔ Competitive Pricing ✔ Quality Service ✔ Extensive Stock ✔ Experienced Staff
 Price
PriceSetting Up a Router for the First Time
A Guide to Setting Up a Router for the First Time
If you are a newcomer to routing it is important to spend a little time familiarising yourself with the controls, features and accessories.
Find a guide to common router features and controls here.
You need to build up some confidence in its handling and thoroughly understand what it all does. Take it out of the box, read the instruction book and then have a play with the various components. Read on for help with using a router for the first time.
Initial Checks
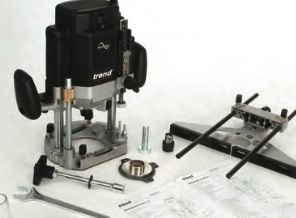
1. Check the machine thoroughly and compare the list of parts in the manual to what you have in reality. This will help familiarise you with some of the terminology as well.
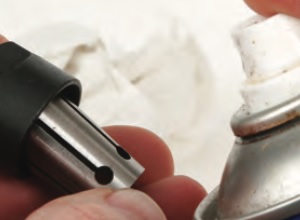
2. Remove the collet and lock nut. Clean off any protective grease and apply a little light machine oil.
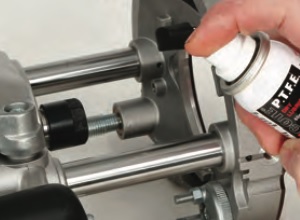
3. Make sure the plunge columns are really clean, and then apply a light coating of dry spray lubricant.
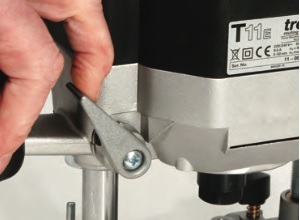
4. Release the plunge lock and check that the action operates smoothly by bringing the carriage up and down a few times. The lock should grip positively without having to apply excessive pressure.
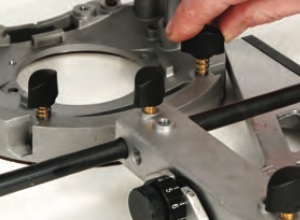
5. Check that all screw threads are clear of swarf and that the clamping screws and other threaded parts operate without binding or cross threading.
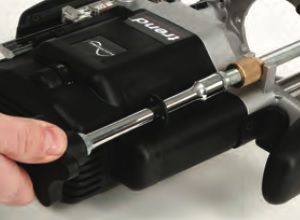
6. With the aid of the instruction book, try fitting all the other loose parts and accessories together. The fine adjusters and other controls should work easily.
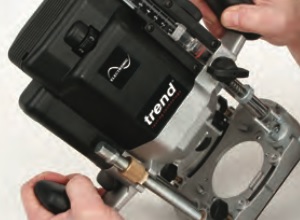
7. Plug the machine in and see how the motor runs. It should feel smooth and not vibrate excessively. There may be some initial sparking as the new brushes bed in, but this should settle down after a few minutes running.

8. If it has variable speed, check that this control operates correctly with a smooth, step-less speed transition. If all is well, you are now ready to put your new router to work, so let’s make a start and fit a cutter.
Fitting a Cutter
Before you start making any adjustments, make sure the router is unplugged from the mains and get into the habit of doing this every time you change cutters.
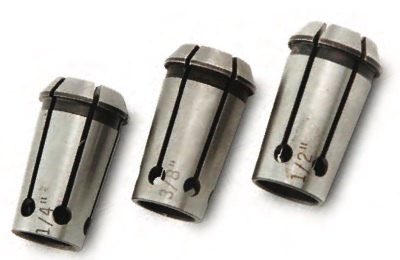
Some routers are supplied with several different sized collets so make sure you fit the correct one for the cutters you are using. Better quality ones should be clearly labelled. Remember that the difference between metric and imperial collets is often minute, but enough to damage both the collet and cutter if you mismatch them. Where appropriate, fit the collet into the locknut before you insert it into the spindle.
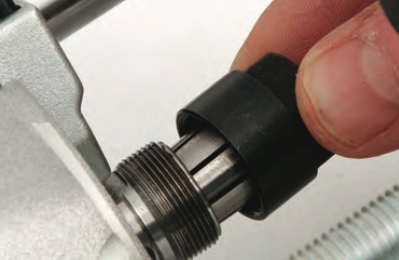
Take care not to cross-thread the nut as the thread is very fine and easy to fit incorrectly. If you are struggling with this, try turning it anti-clockwise a few times first just to line it up and then screw it on clockwise a few turns with your fingers. Fit the cutter by pushing at least three quarters of the shank length into the collet, or up to the insertion point if it is marked. This amount is essential for a secure grip that won’t cause the cutter to vibrate or damage the shank.
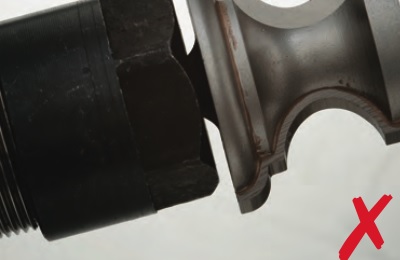
Don’t insert the shank in completely in the mistaken belief that it will be even more secure. In this situation, the collet tries to tighten up on the irregular web at the bottom, but can then only grip unevenly, if at all. Also, the shank can bottom onto the actual router spindle which leads to excessive vibration and may damage the motor. There are similar problems if you don’t push the shank in far enough and you should resist the temptation to gain extra depth of cut by hanging the cutter a long way out of the collet.
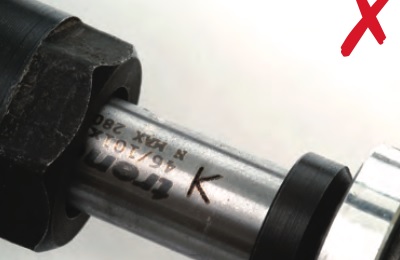
There is a real danger here of the cutter coming out and/or damaging the collet. Tighten up the nut as far as you can by hand and then lock it using the spanner provided with the machine. Modern routers have a spindle lock so you only need to use one spanner, but make sure it is the right size or you will round over the nut. Don’t over tighten the nut. Remember that the spanner gives huge leverage and there is no need to lean on it with tremendous force. If the cutter shank and collet are both in good condition you should be able to get it secure with moderate pressure only. If you cannot, something is wrong somewhere, so check the condition of the nut and collet.
All cutters SHOULD be marked with the K-Mark which shows the depth at which to insert the cutter in the collet.
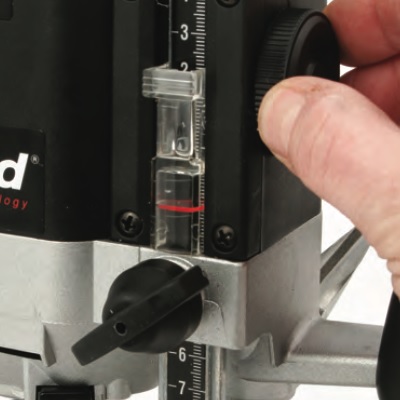
Setting the depth of cut: No matter what type of cut you are making, it is essential to preset the final depth using the stop built into the router. These stops vary from a simple rod and clamping knob to a more sophisticated geared slide.
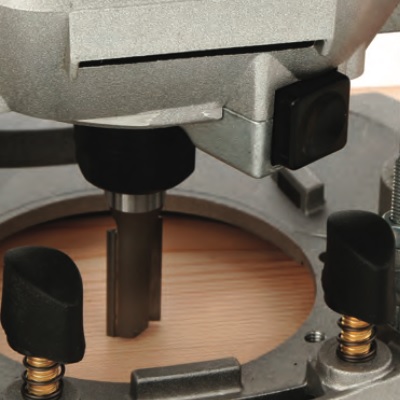
Precision stops may also include a micro adjustment or dial gauge. The stops allow you to cut grooves, housings and recesses to a consistent depth, particularly if you are making multiple passes. Remember, that to avoid overloading the router and tooling, make deep cuts by taking a series of shallower passes to reach full depth. There are several ways to set the depth stop, depending on what you are doing.
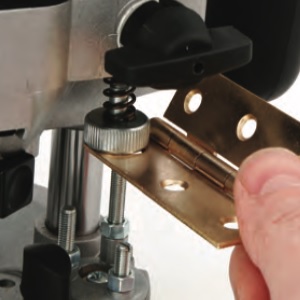
Whilst this method is quick and easy for most situations, it isn’t over precise and there are alternatives where the depth setting is more critical, for instance, when inlaying something like a hinge. In this case, use a piece of the actual inlay material itself as the spacer between the rod and turret. Alternatively, turn the router upside down and use a rule or gauge to set how far the cutter protrudes, adjusting it with the plunge action. Lock up at the required depth and then fix the depth stop rod at this setting.
The simplest way is to stand the router on a flat surface and plunge down until the cutter just touches the surface, then lock the plunge mechanism. Now lower the depth stop rod until it touches one of the spindles of the turret stop, ideally the lowest one. Refer to the scale on the router body prior to raising the rod by the required depth of cut and locking it in place with the knob. Release the plunge lock and let the router resume its normal resting position.
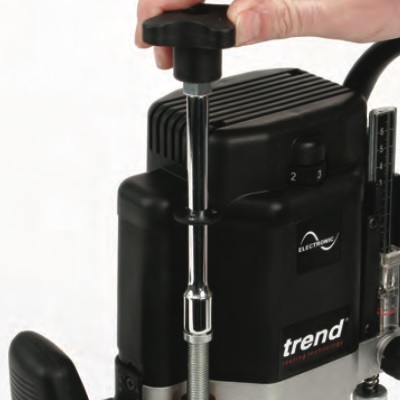
Always make a trial cut in a piece of scrap if the setting is critical, or consider fitting a fine adjuster which will allow very precise depth control by over-riding the plunge action and effectively giving you all the precision of a fixed base router. Usually sold as an accessory, the majority of these fine adjusters replace the depth stop rod and screw directly into one of the turret spindles, though some are built into the plunge column. With the plunge lock released, they allow you to screw the body down in a very controlled way, but remember to lock it up when you reach the required setting as vibration during a cut can cause the adjuster to unscrew.
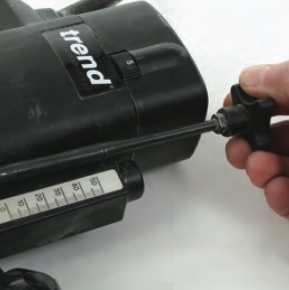
A fine adjuster like this is vital if you are working with the router inverted under a table, or with many of the jigs like a dovetailer where the fit of the joint relies on minute adjustments to the cut depth. The turret stop is provided so that you can make a series of cuts at preset depths. This is particularly useful if you have a very deep cut to make and want to divide it up into a series of intermediate shallower passes.
Using a Three Position Turret Stop
Once the turret stops are set up, the procedure for using them is as follows: e.g for a 9mm groove.
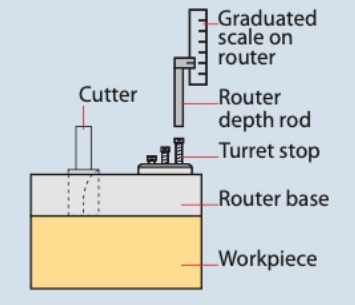
Step 1. Set the turret stops to equal steps (i.e. 3mm or as required). Lower the tip of cutter onto workface and set the depth rod to equal a distance of 3mm above highest stop.
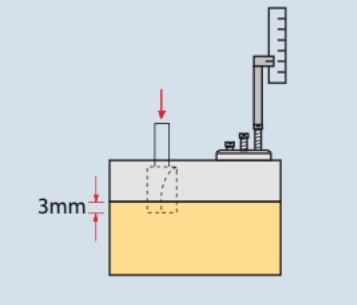
Step 2. Plunge cut to the first stop (3mm) and rout to complete cut to that depth.

Step 3. Rotate turret to the centre stop and cut the work to that depth (i.e. 6mm total depth of cut).
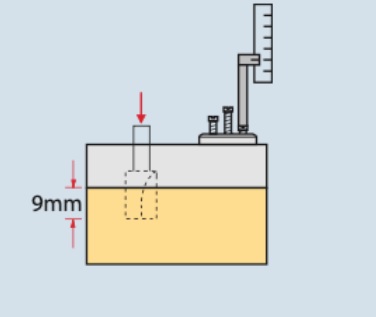
Step 4. Rotate turret to the lowest stop and cut the work to that depth (i.e. 9mm total depth of cut).
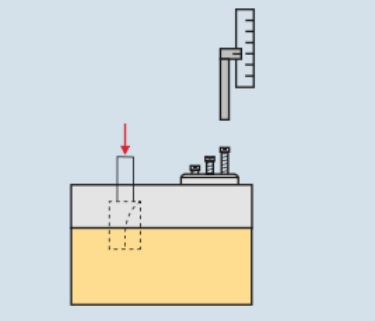
Step 5. To cut a further depth, set the cutter to the bottom of the cut, and retract the depth stop rod. Rotate the turret back to highest stop and set the rod to the required depth (i.e. 3mm). Repeat steps 2 to 4 until required depth of cut is reached.
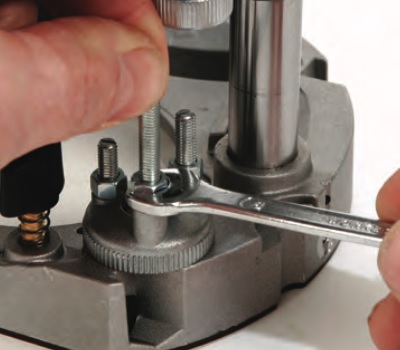
The cutter turret rotates on ‘click stops’ to line up under the stop rod for each pass. However, each turret is independently adjustable relative to the others. To adjust, simply slacken off the lock nut, then wind the screw in or out with a screwdriver and then re-secure it with the locknut. Sometimes you don’t always want to retract the cutter back into the router base, particularly if it is at a fixed setting with a fine adjuster. But avoid putting the router down on the bench with the cutter exposed as this is potentially dangerous and damaging to both you and the cutter, especially if you don’t wait for the cutter to come to a stop first.
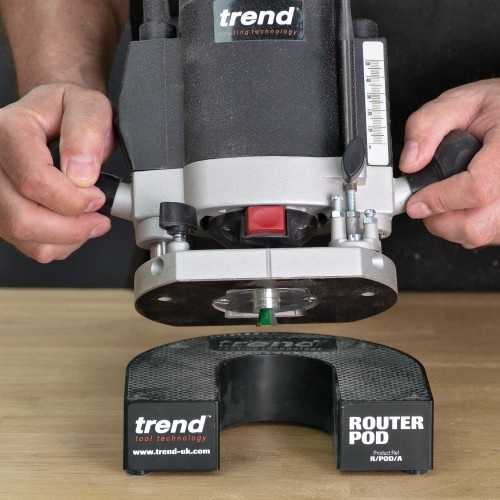
You will need something to hold your router in a safe upright position between cuts.
Using the Side Fence
All routers come with a side-fence, which is essential for machining grooves and mouldings in a straight line, either on an edge or parallel to it. It fits onto the router with two guide rods, though some smaller machines may rely on just one. Coarse adjustment to the width is made by sliding it along the rods then locking it in place with the knobs.
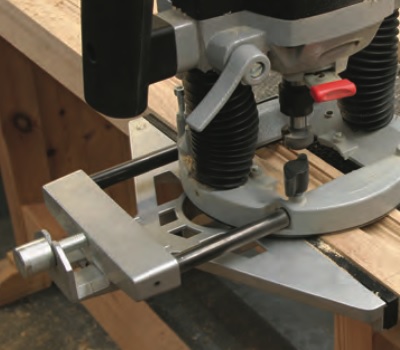
Side-fences are generally fitted with plastic facings that are slotted to allow you to close the gap between their ends and the cutter. Making this gap as narrow as possible reduces any risk of the fence pulling in at either end of the cut, but do leave at least 3mm clearance to allow shavings to clear freely from around the cutter. Whilst it is not essential, try and make the effort to adjust the gap to suit each cutter, particularly if you are working with extreme sizes.
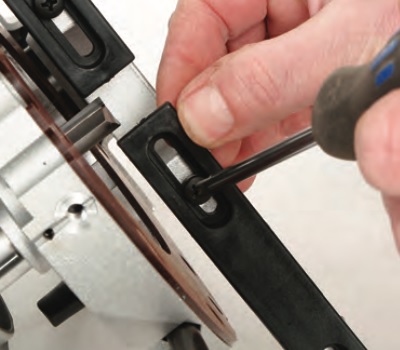
As with the depth control, you can add a fine adjuster for more precise setting. The maximum distance that a cut can be made from the edge of a workpiece is determined by the length of the fence rods. This distance can be increased by substituting longer rods and some manufacturers offer this as an option. However, if the length gets excessive they tend to flex unduly and the cutter starts deflecting off line.
The First Steps
To familiarise yourself with applying the router, first, make a simple groove with a straight bit.
1. Ensure the router is disconnected from the power supply.
2. After fitting the bit and setting the depth of cut, insert the side fence and adjust to suit the position of the groove required.
3. Secure the workpiece and check there are no obstructions, and all knobs are secured.
4. Make sure the router is NOT switched on and the bit is free to rotate.
5. Connect router to the mains and rest router on the component with the side fence against the edge.
6. Switch on and allow the router to reach full running speed.
7. Release the locking handle (or knob) and plunge to the first depth setting.
8. Immediately guide the router in the direction shown. Keep a steady feed speed with gentle pressure in the direction as shown.
9. When work is complete, release the plunge control to allow the bit to retract from the workpiece.
10. Switch off the router and wait for it to stop revolving.
11. Put router to one side and disconnect from mains.

The Guide Bush
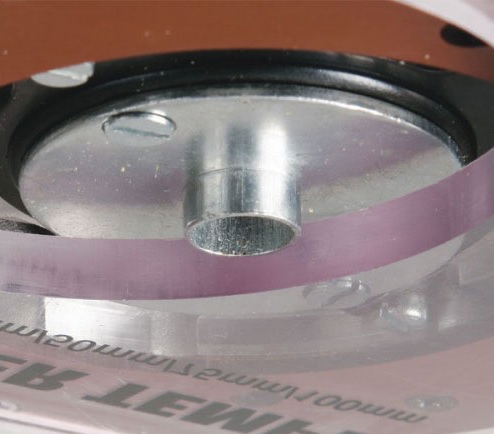
A template guide bush is used in conjunction with a template when the routing operation is repetitive or complex in shape. The template is cut from 1/4' MDF, plywood or plastic to the shape required. The template is then fixed to the top of the workpiece. The guide bush is fitted into the base of the router. A bit is chosen with a diameter which will pass through the centre of the bush leaving enough clearance. The router can then be guided around the template so that the shape of the template will be replicated. It is important that the material used for the template is thicker than the projecting guide bush.
The Beam Trammel
The beam trammel is used for routing curves or circles accurately. The trammel is fitted into the base of the router and adjusted to suit the radius of the curve required. The router is fed in a counter-clockwise direction, with constant pressure placed on the pin to prevent it from moving.

Batten Guide
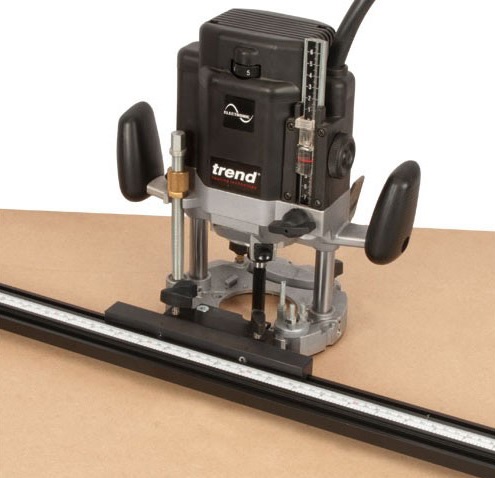
Guidance from a batten or clamp guide is similar to that obtained from a side fence. This method is appropriate if the edge of the workpiece is not straight or is not very smooth or simply the guide rods of the side fence are too short. The standard technique is used, and side pressure is used to ensure the router does not wander from the batten.
Know Your Cutter

Find everything you need to know about Router Cutters here.
We stock a wide range of high quality Routers from top brands such as Trend, Festool, Mafell, Metabo and more.


 01726 828 388


