✔ Competitive Pricing ✔ Quality Service ✔ Extensive Stock ✔ Experienced Staff


 01726 828 388


Straight Line Routing
Straight Line Routing
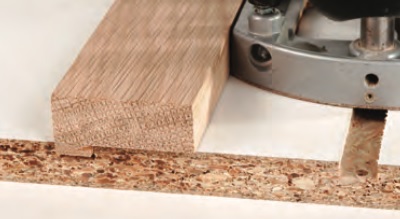
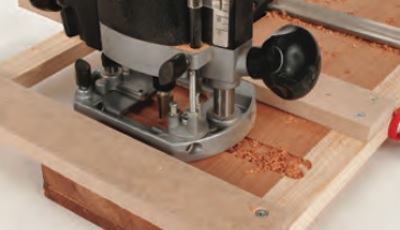
Sometimes it is just not convenient, or even possible, to use the side fence for straight cuts. For instance you may be routing a groove across the face of a very wide workpiece and the bars of the side fence are just not long enough and would certainly be very unstable even if they were. In this case, the router can be guided by a simple straight fence, such as a timber batten or clamp guide. All routers are made with the baseplate concentric to the cutter axis, although some may also have one or two flat sides to ensure that the router will run against a straightedge.
Straight guides should always be made from a rigid material that is at least 8 mm thick. This will prevent it from flexing along its length and also stop the router accidentally lifting up over the edge. Stable materials such as MDF, plywood, or Perspex are ideal, and the guide must be wide enough to allow it to be held securely in position with suitable clamps that are out of the path of the router. It must also be longer than the required length of cut to allow the router to be guided accurately at the entry and exit points of the cut and prevent it turning in.
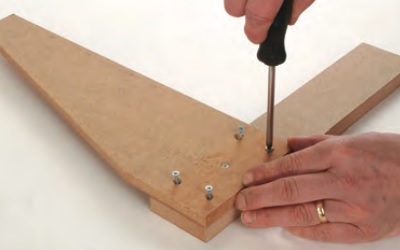
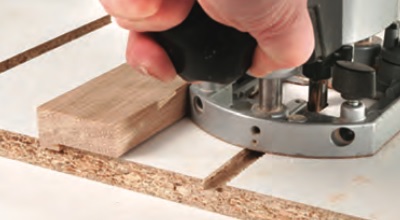
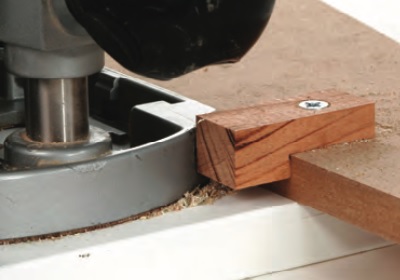
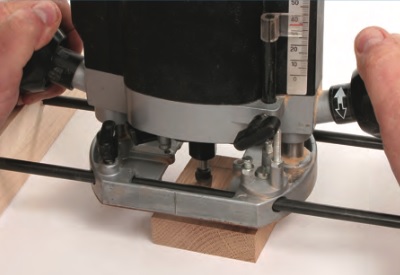
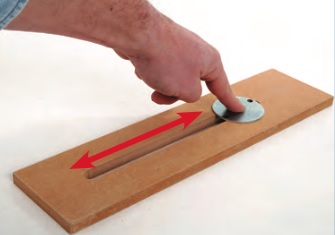
To help you line up the straightedge accurately every time it can be fitted with a stock at one end, very much like a standard Tee square. You can buy ready made versions, but it is quite simple to make up your own. Make sure that the stock is long enough and fixed to form a perfect 90° angle. Then, with the router running against the guide, machine a slot across the stock, (clamping it against a piece of scrap will help to minimise breakout.)
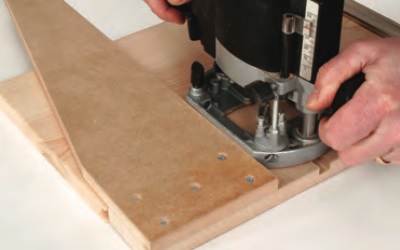
Finally, use a V cutter to put a centre line down the middle of the groove as an aid to positioning. Now all you have to do is align the groove in the stock with the centre line of the required cut.

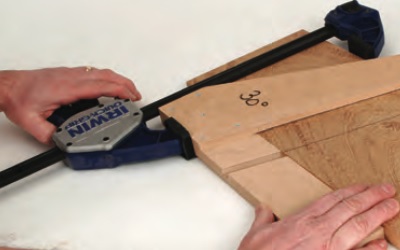
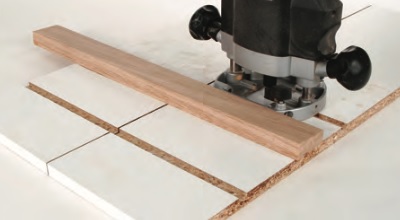
Of course you can develop this idea further for cutting at an angle across the workpiece by attaching the stock to the straightedge at the necessary angle, either by screwing it in place for a permanent arrangement, or using a bolt and wing nuts for an adjustable guide. No matter what sort of straight guide you choose, it is essential that it is clamped firmly in place. You can use standard G clamps, which are usually to hand in the workshop, but other clamps and holding devices are less likely to obstruct the path of the router and may offer a better solution. These include end socket and toggle clamps fitted to the ends or underside of the guide.

Ideally, use clamps that can be operated single handed, as you can then hold the guide in place with the other hand as you tighten up to stop it moving as the pressure comes to bear.
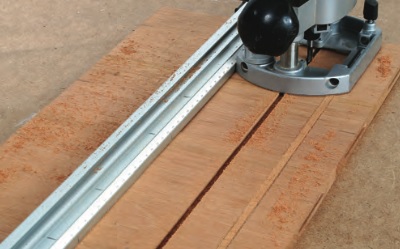
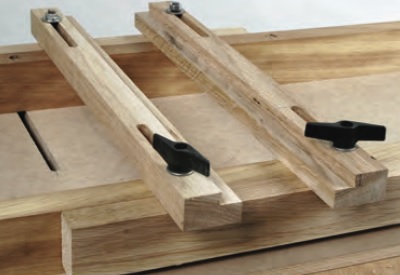
Clamp Guides and Tracks
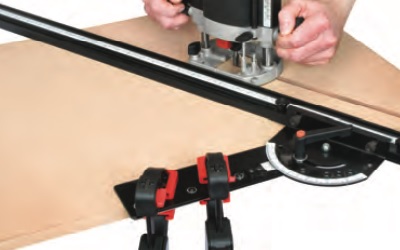
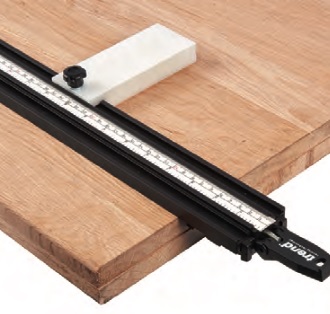
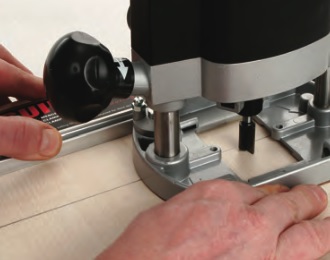
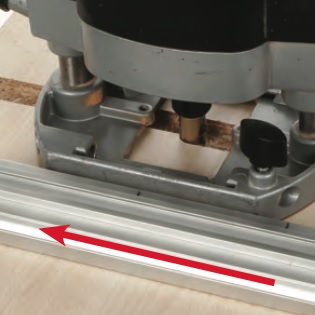
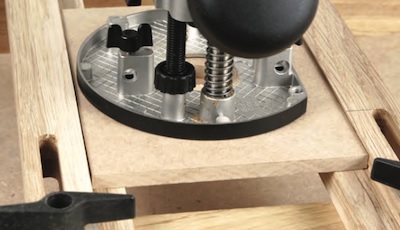
Ready made clamp guides, consisting of low profile extruded aluminium straightedges with integral clamping systems, are one of the best options for guiding the router along straight cuts. They are available in a variety of different lengths and the simple clamping action allows the guide to be fitted quickly, whilst the low profile presents little obstruction to the path of the router.

As these guides are mainly intended for use with square edged workpieces, they may not always be able to grip properly if the workpiece is very thin or is already moulded along the edge, as in a kitchen worktop. In this case, deeper detachable jaws are available as an optional accessory. Similarly, you can also add a squaring attachment that clips to the fixed jaw and allows more accurate positioning for 90° cuts.

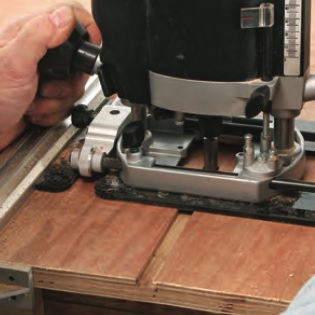
To use these guides, adjust the jaws to suit the width of the workpiece before positioning for the cut. Then apply light pressure by lowering the locking lever half way and check that the guide edge is still correctly positioned. You can tap it gently to make minute adjustments before applying final pressure by lowering the locking lever fully. Although not self clamping the Trend Varijig angle guide allows you to make precise angled cuts.
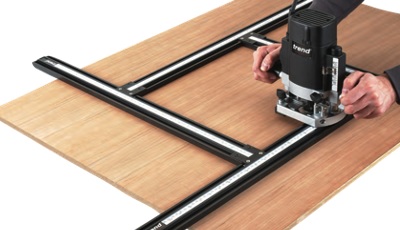
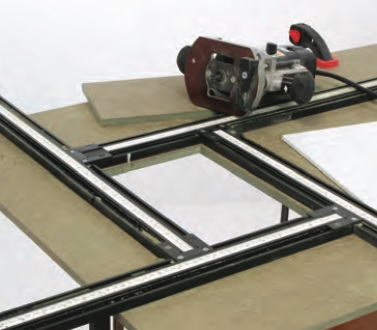
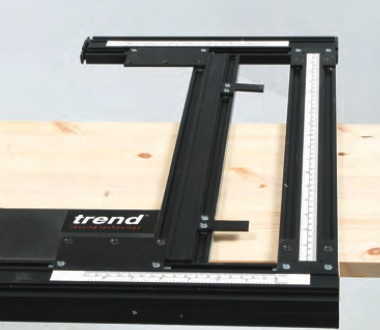
A more sophisticated version of this arrangement is the guide track system where the router is mounted on a sliding plate that fits into a Tee slot along the top of the track.
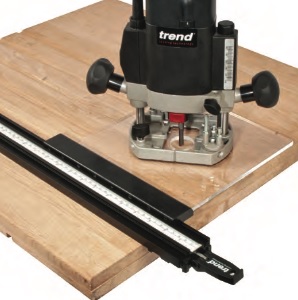
This is obviously a superbly accurate arrangement and the tracks are available in detachable sections of various lengths to suit virtually any application. They are particularly good when you are working with large sheets of material. The Trend Clamp Guides can also be fitted with stops to limit the router travel if you are cutting stopped housings, slots, etc.
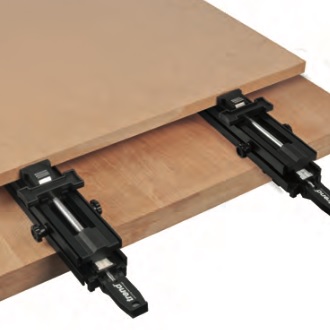
Special Back-to-Back clips can be used to join two clamp guides which allows you to attach the guide directly to the bench and you can then use the top jaws to hold the work.
Positioning a Straight Guide
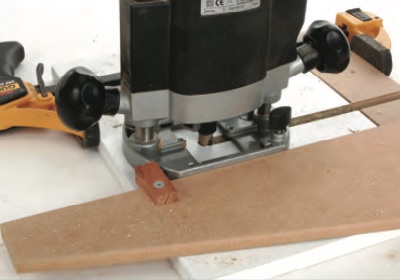
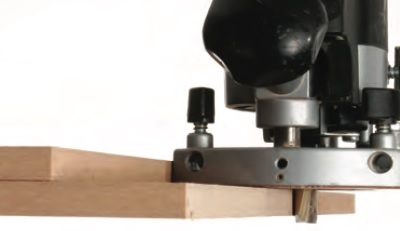
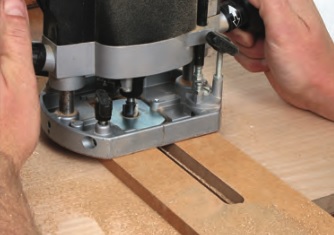
Start by marking out the position and width of the cut on the face of the work. If you are using a router with a flat sided base, turn the cutter so that the cutting edges are at right angles to the flat side. Measure the distance from the cutting edge to the outside edge of the base.

Then measure off this distance on the workpiece at both ends of the cutting line, working to the left-hand side of the groove. Position and clamp a straight guide against these lines. The procedure is slightly simpler if you’re using a round-based router as you can measure the distance from the cutter to the edge anywhere around the base.

The other way of positioning the guide is to stand the router on the face of the workpiece at one end of the required groove with the cutter’s edge against the cutting line. Mark the edge of the base plate on the workpiece, or even better, slide the edge of the straight guide up to it and lightly tighten. Repeat with the base at the other end of the line, re-check the first setting and then fully tighten the clamp.
If you do a lot of work with a particular router/bit combination, machine up a piece of thin MDF or plastic to be exactly the same width as the distance between the edge of the router and the cutter and use this to position the fence clamping line.
Feed Direction
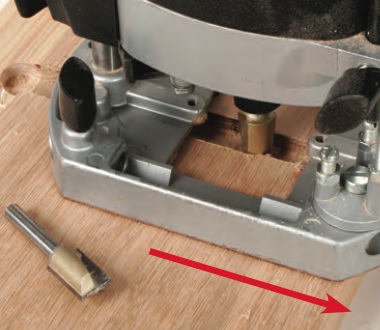
When you are using a straight guide, always cut from left to right to maintain the correct feed direction, i.e. against the rotation of the cutter, as this will have the effect of pulling the router into the guide edge rather than allowing it to wander off line.
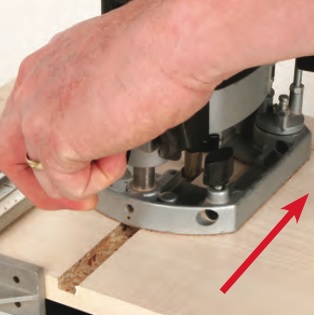
If you need to make more than one pass to get the required width of groove, make the second cut to the left of the first one to maintain this pulling action.
A very quick way to make multiple cuts without having to reposition the guide each time, is to use a thin spacer sandwiched between the guide and the router for the first cut and then remove it for the second one. This ensures that you can reproduce the same groove width each time.

With the Trend CRB Jig, the built in micro adjuster gives a precise offset. All you have to do is position the clamp guide approximately, then adjust the router for position on the CRB and machine your groove. If you need further parallel grooves up to a max of 110mm centres you can leave the guide in position and just move the router on the CRB.
Cutting Parallel Housings
Sometimes, it is necessary to machine a series of equally spaced housings. This can be both difficult and time-consuming if you try and position the guide by measuring each time. Instead, just screw a spacer batten to the underside of the straightedge and the job becomes foolproof.
The spacer batten must be a smooth sliding fit in the groove and is fixed to the underside of the straightedge at the distance equal to the required housing spacing, less the base plate/cutter edge margin. It must also be perfectly parallel to the guide edge. Cut the first housing at the end of the work by clamping the guide across the workpiece with the batten uppermost.
Remaining housings are then cut by dropping the spacer batten into each previous cut. If you’re making matched components like a pair of bookcase ends, clamp each pair edge to edge and cut across both faces in one pass, to ensure they are identical.
Stopped Housings
If you don’t want the grooves to run right across the width of the work, as for instance in a stopped housing, you can fix stops to the top face of the straightedge to limit the travel of the router.
This can either be screwed or clamped to the guide for a one-off application, or made to be fully adjustable by cutting a slot in the guide and locating the stops with a coach bolt and wing nuts. Make sure that there is a gap underneath the stop so that sawdust cannot accumulate between the base and the stop and cause a false reading.
Cutting Across Uneven Surfaces
If you need to cut across an uneven surface it is obviously impossible to get the router to run smoothly and produce a consistent depth of cut. In this case, make up a stepped straightedge by gluing together two lengths of relatively thin material, something like 8 mm MDF is ideal. Make one piece wider than the other by slightly more than the base plate to cutter edge measurement. Fix them together so that the back edges are lined up and then trim the bottom edge parallel to the top by running the router base against the upper edge.
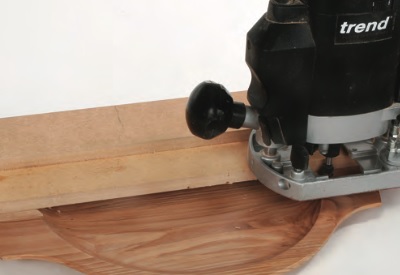
The guide can then be used in the same way as the normal straight guide, clamping it at either end to bridge the uneven surface. If you’re removing the waste or ground from a flat area, such as a relief carving, the router must somehow be supported straight and level above the surface while the waste material is cut away and there are several methods for achieving this.
2) On wider surfaces, the cutting operation can be planned to leave raised areas which are then cut away later by hand, or by fitting temporary support blocks over the cut face, or you can fit a large sub- base to the router to allow it to span over a wide area. If this is cut from a transparent material like acrylic you’ll get a clearer view of the cutter.

3) If there is no support available from the workpiece, span it using ski pads fitted to the ends of the router side fence rods, but your bench must be absolutely flat for this to work accurately.
4) For extra rigidity if the cuts are likely to be heavy, make up a support frame and mount the router on an adjustable sliding carriage. This can be made up quite simply using scraps of timber, although there are more sophisticated ready-made versions that fulfil a range of support functions if you anticipate extensively doing this type of work.
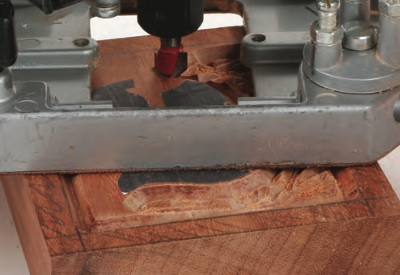
If you are removing a wide area that is recessed to an edge such as a half lap joint, always cut the shoulder first and then start the waste removal from the end of the work and gradually move the cutter inwards to ensure that half the router base is always firmly supported. Working the router in the opposite direction will gradually reduce the support, eventually causing the base to drop into the cut.
Straight Cutting with a Guide Bush
Sometimes a groove has to be really precise and simply relying on running the base of the router against the straightedge may not be accurate enough. There is always the chance of a tiny amount of wander if the router is not kept firmly against the guide throughout the cut.
To avoid this, make up a straight guide with a slot cut along its centre line to take a guide bush, but the cutter/guide bush combination must be carefully matched to produce a free running slot with no side play.
Frame Guides
If you need precision, along with a degree of versatility and do not want to use a guide bush, then it is useful to make up a frame guide by linking two straightedges together to form a square routing frame. This allows you to cut wide housings or slots, by spacing the two straightedges slightly wider apart than the width of the router base. Remember to feed the router against the cutter rotation to ensure the router is kept firmly against the guides at all times. Any waste between the cuts can be removed using the router freehand.
A further refinement of this idea is to make an adjustable wooden frame using coach bolts fitted with wing nuts. If the straightedge and their linking pieces all have suitable slots cut along them, the frame can be setup for a variety of different cuts and you can also add clamping lugs to simplify mounting the frame, as well as sliding stops for cutting stopped housings. The router base can either slide directly on the frame members or fit it to a sub-base. The slotted arrangement of the fences also allows the guides to be set at an angle across the workpiece and the frame can be used to cut louvre and angled housings across the work.
The Trend Varijig, a highly accurate and adjustable frame, is available in a variety of different forms. This system allows precise cutting of rectangles & squares, grooving & tenoning. It also incorporates an anti-tilt block for the router if you decide to use it with a guide bush rather than guiding with the router base itself.
All these grooving cuts are effectively inside cuts, with the router bit cutting both sides of the groove and they rely on the router being held firmly against the edge guide. If you do not concentrate fully during this operation or the guides become loose in anyway, the cutter will go off-line. This sometimes happens if the density of the workpieces suddenly varies, for instance if you hit a particularly hard knot. Whilst there is relatively little danger to the user, the cut will not be what you intended and will probably wobble off line.
For this reason it is sometimes beneficial to make the cut with two different diameter cutters, the first one slightly narrower than the second one, as the light cut from the second pass is less likely to be deflected off line and there is also room for the chips to escape cleanly as well.
A Tenon and Grooving Jig is another very neat and flexible jig that can be used for a variety of grooving and cross-cut work with circular saws or routers, it uses the same extrusion profile as the varijig.
After clamping the guide in position, always check with a square or mitre gauge to ensure that the position is still perfect and has not moved slightly during the clamping.
We stock a wide range of high quality Routers from top brands such as Trend, Festool, Mafell, Metabo and more.


