✔ Competitive Pricing ✔ Quality Service ✔ Extensive Stock ✔ Experienced Staff


 01726 828 388


Using the Side-Fence
Routing with the Side-Fence
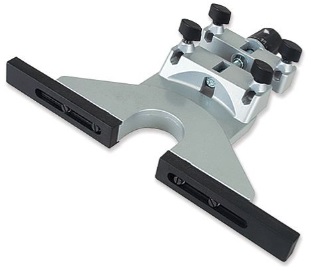
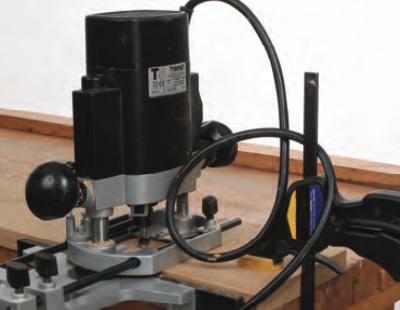
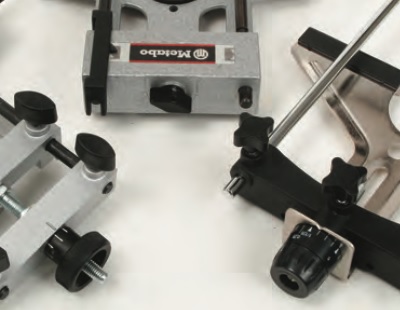
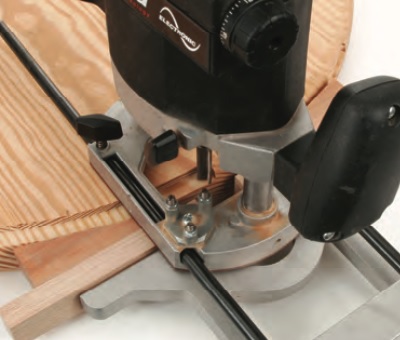
Although each side-fence is usually designed specifically for its own particular make or model of router there are third- party versions available designed to fit all popular routers, e.g. the Micro fence. These often represent a significant investment, but they can offer increased accuracy and versatility over the standard guide. Typically, the side-fence is fitted to the router with a pair of parallel metal rods which slot into the base plate, and it can then be locked in place with clamping screws in both the fence and base castings.
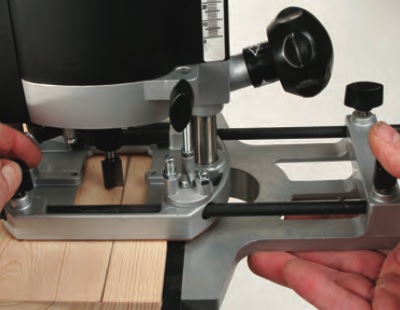
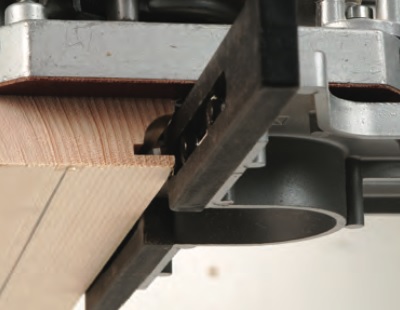
Better quality fences are fitted with false plastic facings held by recessed screws. Facings are slotted and adjustable so you can reduce the gap between their inner ends and the cutter. Closing the faces in this way reduces the risk of the fence pulling in at the start and finish of a cut. However, you must allow sufficient space for the waste to clear quickly and freely from around the cutter, 2 or 3 mm should be sufficient. This arrangement also means that the standard facings can be removed and replaced by custom-made wooden versions for special applications.
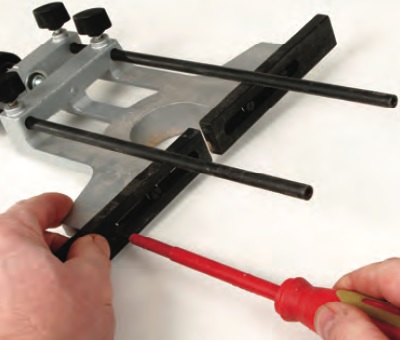
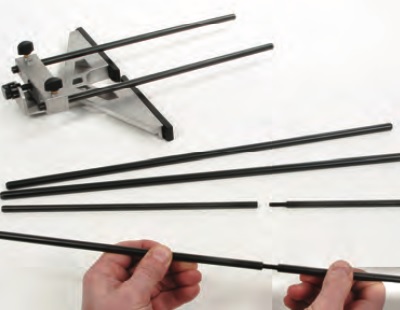
The maximum distance that a cut can be made from the edge of the workpiece is determined by the length of the rods supplied. This distance can be increased by substituting longer rods of the same diameter, or by using extending rods that screw together. However, if the length becomes excessive they tend to flex, causing the cutter to leave a distinctly rippled effect.
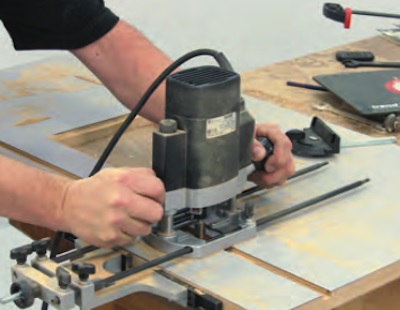
A side-fence can be somewhat clumsy to use and some practice is needed to apply it smoothly every time. The protruding ends of the fence rods and even the fence itself, need a significant amount of working room, so always do a dummy run with the router switched off to make sure there will be no obstructions when you come to make the actual cut. Clamps are notorious for getting in the way and also check that the power cable is clear and cannot become trapped in the fence.
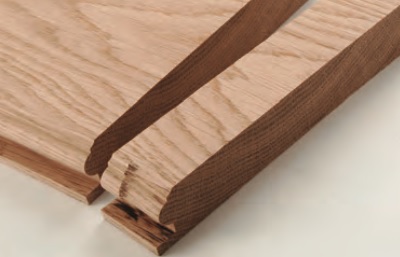
When you’re using the side-fence, the feed direction of the router should always oppose the direction of cutter rotation to keep the fence pulled in hard against the work. However, it may sometimes be necessary to use the back cutting technique already described for some edge trimming or moulding operations. This is quite acceptable provided cuts are only light, but as the rotational action of the cutter is now trying to pull the fence off line, this technique should never be used when cutting grooves or panel moulding.
Positioning the Side-Fence for Cutting Grooves and Housings
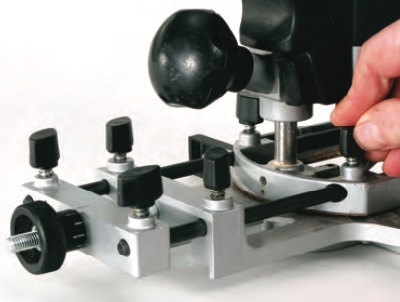
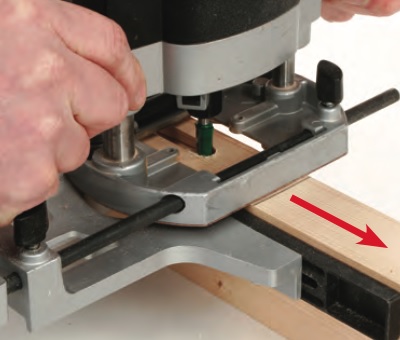
Mark out the position and width of the cut on the face of the first workpiece. Place the router on the face of the work and lower the cutter until it just touches the surface. Turn the cutter by hand until the cutting edges are aligned at right angles to the face of the fence. Now position the cutting edge against the marked line, and slide the fence up tight against the edge of the workpiece. Tighten all the clamping screws on both fence and router, making sure that the cutter remains on the line as you do so.
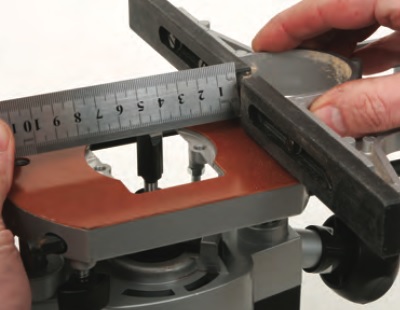
An alternative way is to measure the required distance between the fence and the nearest cutting edge, but always remember to measure to the actual cutting edge rather than the body of the cutter as these are not the same diameter. Check the setting by placing the router over the work and lowering the cutter onto the surface. If there are several identical pieces to be machined, it is only necessary to mark out the first piece, as the fence settings will reproduce the same cut on subsequent pieces.
For really fine adjustments of the fence some form of micro adjuster is essential. If this is not a standard feature of your fence it is usually available as an optional extra, so again check availability before you buy a particular model of router. Although the design of micro adjusters varies, they all work on the same principle and allow you to make minute adjustments that are difficult to achieve by manually sliding the fence along the rods. Sometimes just the act of tightening up the locking screws on the fence is enough to move it slightly out of position. A micro adjuster overcomes all of these problems.
Positioning the Side-Fence for Machining the Edge
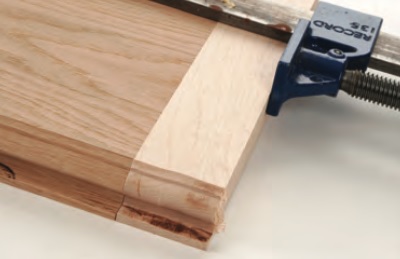
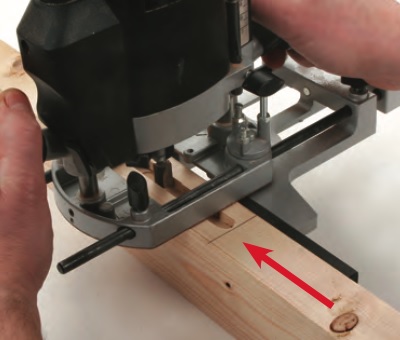
First set the cutter against the marked line and then bring the fence up into position. Adjust the fence facings to allow a sufficient gap for waste material to clear from the cutter. If you have to machine a deep profile that forms an undercut it is impossible to make several passes by adjusting the cutter vertically. Instead, the cut has to be worked in progressive horizontal steps resetting the side-fence to increase the width of the cut on each pass. Maintaining contact between the side- fence and the work is not critical when you are edge moulding, as any deviation will not affect the finished profile, as it can be corrected by making a second pass.
However, as we already seen, if you’re cutting grooves or mouldings within a board but parallel to the edge, any deviation will deflect the cutter away from the line of the cut and spoil the work. Using the fence on the correct side of the router relative to the direction of rotation is obviously the main factor here but also ensure that the edge of the work is square and flat. Drops of glue or resin, or even areas of raised hard grain are enough to cause both fence and cutter to deviate off line. Always maintain an even and constant pressure on the side-fence, keeping it against the edge of the workpiece whilst making the cut.
No matter how careful you are in using the side-fence, it can still catch you out occasionally, usually at the beginning or end of the cut. The usual tendency is for the router to turn in, as there is relatively little support for the fence in these areas, but there are several strategies you can adopt to overcome the problem:
1: By leaving adequate waste at each end of the work that can be cut off after making the cut.
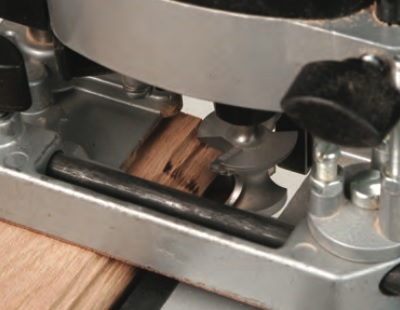
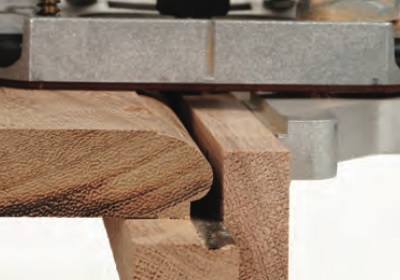
However if you’re making small mouldings that do not cut across the full depth of the workpiece, a one-piece fence can be fitted and the cutter plunged part way into it. This produces a continuous fence that minimises the possibility of the cutter turning in. However, there can sometimes be a problem clearing the waste with a one piece fence, so it may be necessary to cut an additional clearance slot. The same problem can occur at the start and end of the cut in the vertical plane, as the cutter aperture in the base plate drops off the end of the work. This is usually a matter of technique and with a little practice you subconsciously adjust your grip to compensate.

If you are struggling with the router tipping and a particular cut is critical, clamp a long batten alongside the work to support the router beyond the length of the cut edge. This is a particularly useful tip if you are trying to work on the edge of a very narrow workpiece.
Making the Cut
Modifying the Side-Fence
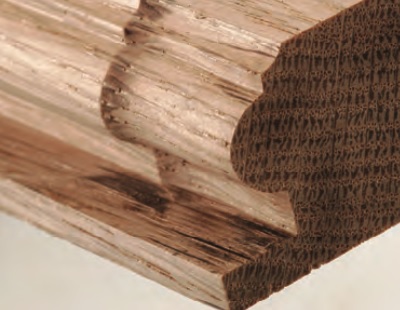
Occasionally the edge profile you are producing may require the addition of an auxiliary face to the side-fence in order to maintain sufficient support. e.g. When cutting a deep profile that will leave an inadequate guiding edge that may not even be line with the fence itself. In this case, screw on a deep fence and run this against a secondary guide edge fitted below the workpiece.
Similarly, if the profile ends up cutting away the full face of the edge, for instance when you’re rounding over or edge planing, you have to modify the fence by fitting a false cheek to the rear portion. Ideally, this should be profiled to be an exact reverse of the moulding but if this is difficult it is usually possible to use a simpler profile to bridge over the detail.
In the case of edge planing, the rear portion of the fence is fitted with a thin spacer to make it about 2mm thicker than the front fence. The cutting edges then need to be aligned perfectly flush with the face of the front fence to produce a cut the same thickness as the spacer.
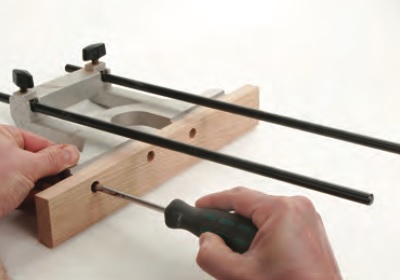
For really accurate positioning of mortise, housings or grooves, the addition of a second side-fence positioned on the opposite side of the work, makes the job foolproof. You may be restricted in this by the length of the support rods, although you can replace the standard ones with longer ones.
If you are using the double fence technique, do make sure that the faces of the workpiece are parallel and the top surface is flat and be aware of the router tipping at the extremities of the cut.

Then turn the router round and make a second pass in the opposite direction. Use the same principle for putting in a series of flutes or parallel grooves, working from either side of the work each time.
Alternatively, use a self centring base. In certain cases, the side-fence can also be used to guide the router against a curved edge. For this, it is necessary to fit a shaped block to the fence, which is either cut to match the radius of the curve, or designed to support the fence against the guide edge at two points only.
Fence Maintenance
For accurate setting it is important that the fence slides smoothly on the rods so these need to be cleaned periodically to remove sticky resin deposits. Another problem is that repeated use of the clamp screws can sometimes raise burrs on the surface of the support rods. These should be removed with a very fine file or fine abrasive paper. A quick spray over with a dry silicone lubricant will ensure the rods slide easily in both the fence and the router base plate. Check that all the clamping screws turn freely, as they sometimes become jammed with fine dust and the fence then appears to be secure when it is not. It is also important that the anti- vibration springs remain in place.

We stock a wide range of high quality Routers from top brands such as Trend, Festool, Mafell, Metabo and more.


